


Azalea Macro Photograph
I finally have the new Phase One XF camera set up to do macrophotography


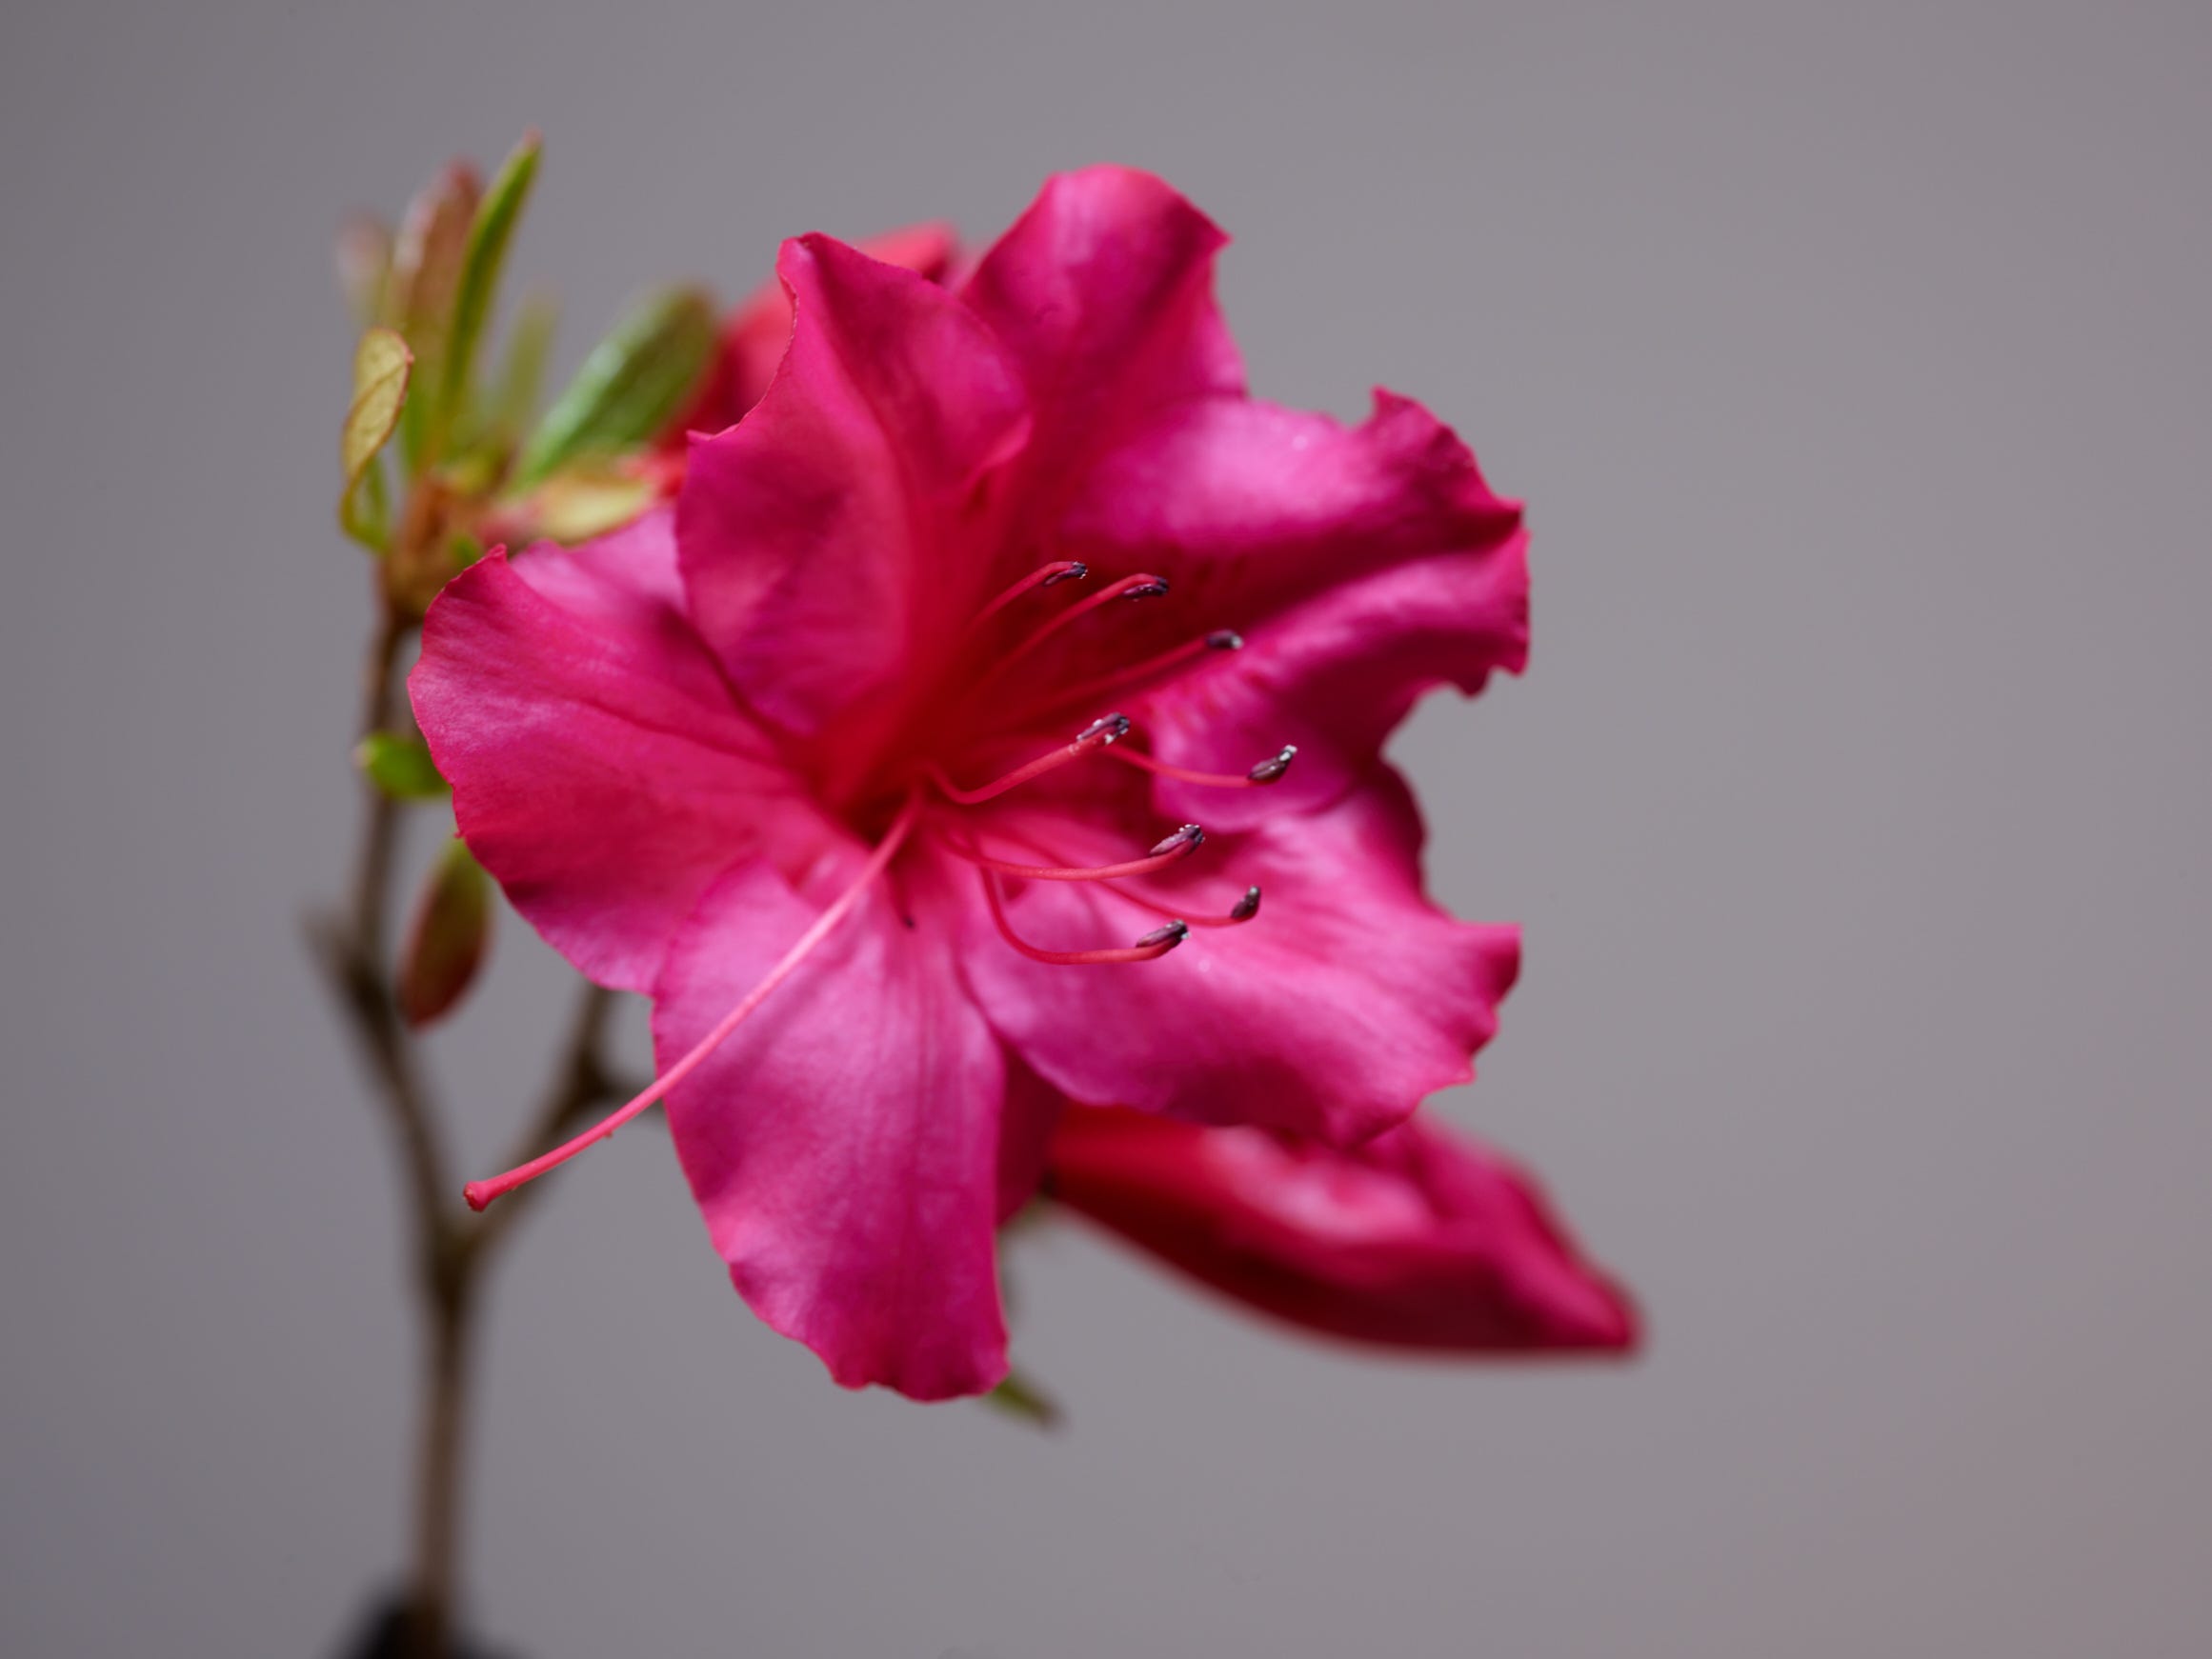
It’s taken a few weeks to get all the stuff together to do focusing stacking (macro photography) with the Phase One Camera. This azalea blossom seemed like a good first subject, but it was…challenging in unexpected ways.
(I did not look this up, but I think it’s right: the stamens are on one side, and the pistil is to the left, in order to limit self-pollination. It might just be random, though…but I thought it was an interesting arrangement.)
Technical info: This was shot with a Mamiya manual-focus 120mm macro lens set to f/8. I took a series of 20 images, slowing moving the camera to focus on new parts of the subject. This is called focus stacking, and I assembled the images in Affinity Photo. The depth of the blossom was about 30mm, so each step was 1.5mm.
Why didn’t I just point the camera at the blossom, focus and shoot? The blossom was so close to the lens that only a small part of it will be in focus at one time (about 2mm of depth is in focus at any point; that is the reason for 1.5mm between photos). Here’s a single frame from the set:
Only the tips of the stamens are in good focus, along with the edge of one leaf at top left (although that looks to be actually slightly out of perfect focus).
So the process is: take a shot; move. Take a shot, move. And so on.
(I took 60 photos because I did not know what the move distance should be from shot to shot. I wound up using every third shot. This is the first attempt with this lens, so I had no experience on which to base my decision. I did take some test shots that made me think the correct number would be in the range of 15-60, so the use of 20 images was not a total surprise.
I used a StackShot to automate the moves from one exposure to the next.
The problem I had to solve was how to take the triggering pulse from the StackShot which is meant to take an exposure, and get it to the Phase One XF camera in a way it would understand.
First, I had to get a special cable/connector (12 pins!) specifically for this camera to trigger shutter pushes remotely. That comes with hand controller with a button; the StackShot has no hands, so that method was not going to work.
The 12-pin cable’s other end was a 4-conductor 2.5mm phone plug (aka male headphone jack). The output of the StackShot is a 3.5mm 3-conductor female.
So I had to convert from 2.5mm to 3.5mm; I ordered some cables that looked like possibles, but what mattered was what was inside the cables: how did they convert the 3 conductors to 4 conductors? (Which inputs go to which outputs?)
I use a multimeter to figure some of them out, but…nothing looked right. And each adapter I tried failed as expected.
I found a random cable that I had picked up somewhere, probably years ago for my iPhone, and…it worked. I was in business! I could trigger the shutter remotely with the StackShot.
That part only took a week to get all the parts once I had figured out what to get, and then a couple of days to try to sort out the wiring.
Even so, it’s one thing to see a device trigger a shot remotely, and it’s another to see if it can do 60 of them.
But it worked, I’m all good now for macro shots.
One other interesting thing: the flower wilted a bit under the lights, and so some of the parts sagged a little. I had to manually use some of the source images to correct this problem. (You copy a tiny bit from whatever image has the problem area in focus. For example, the stamen that bends to the left sagged from one image to the next. I found two images to copy from: one with the stigma in focus, and another with enough of the style to fix the problem.) I had never had a plant subject change so quickly, so I had to learn a new skill in Affinity Photo.
I don’t have a photo of the setup I use; I’ll post it at some point here in the blog.