


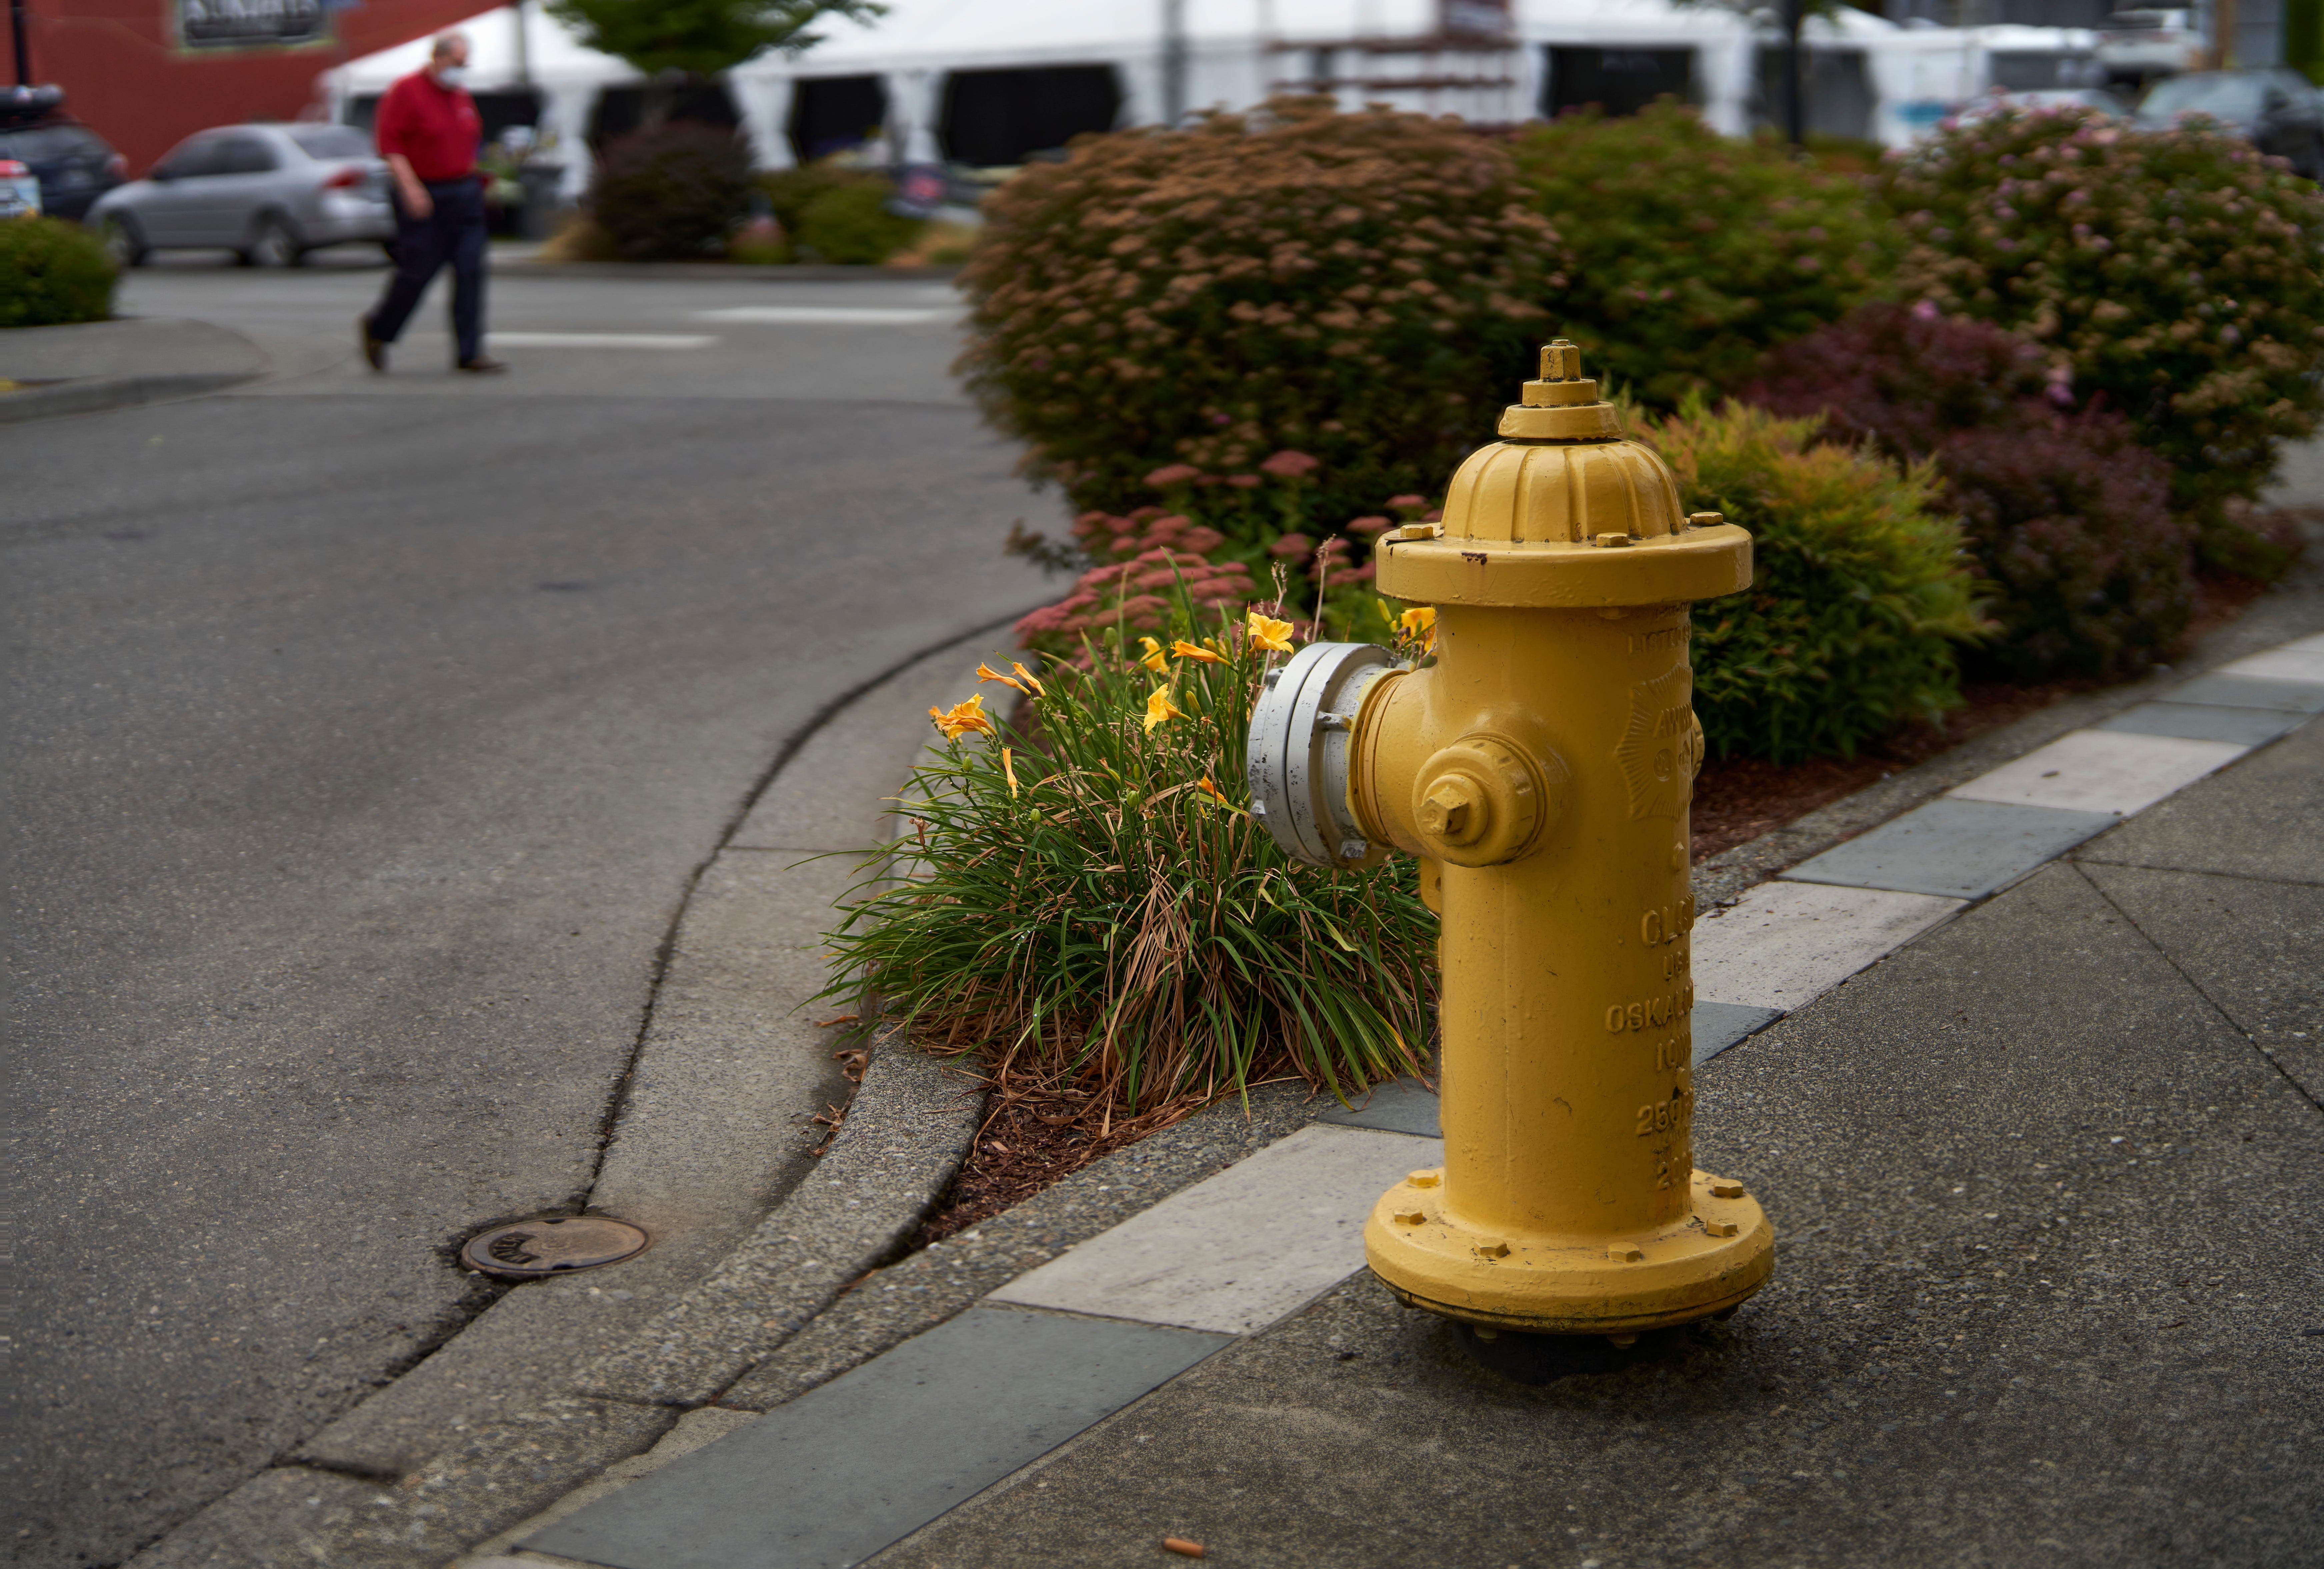
Fire Hydrant in Enumclaw
Focus merge to maintain limited depth of field

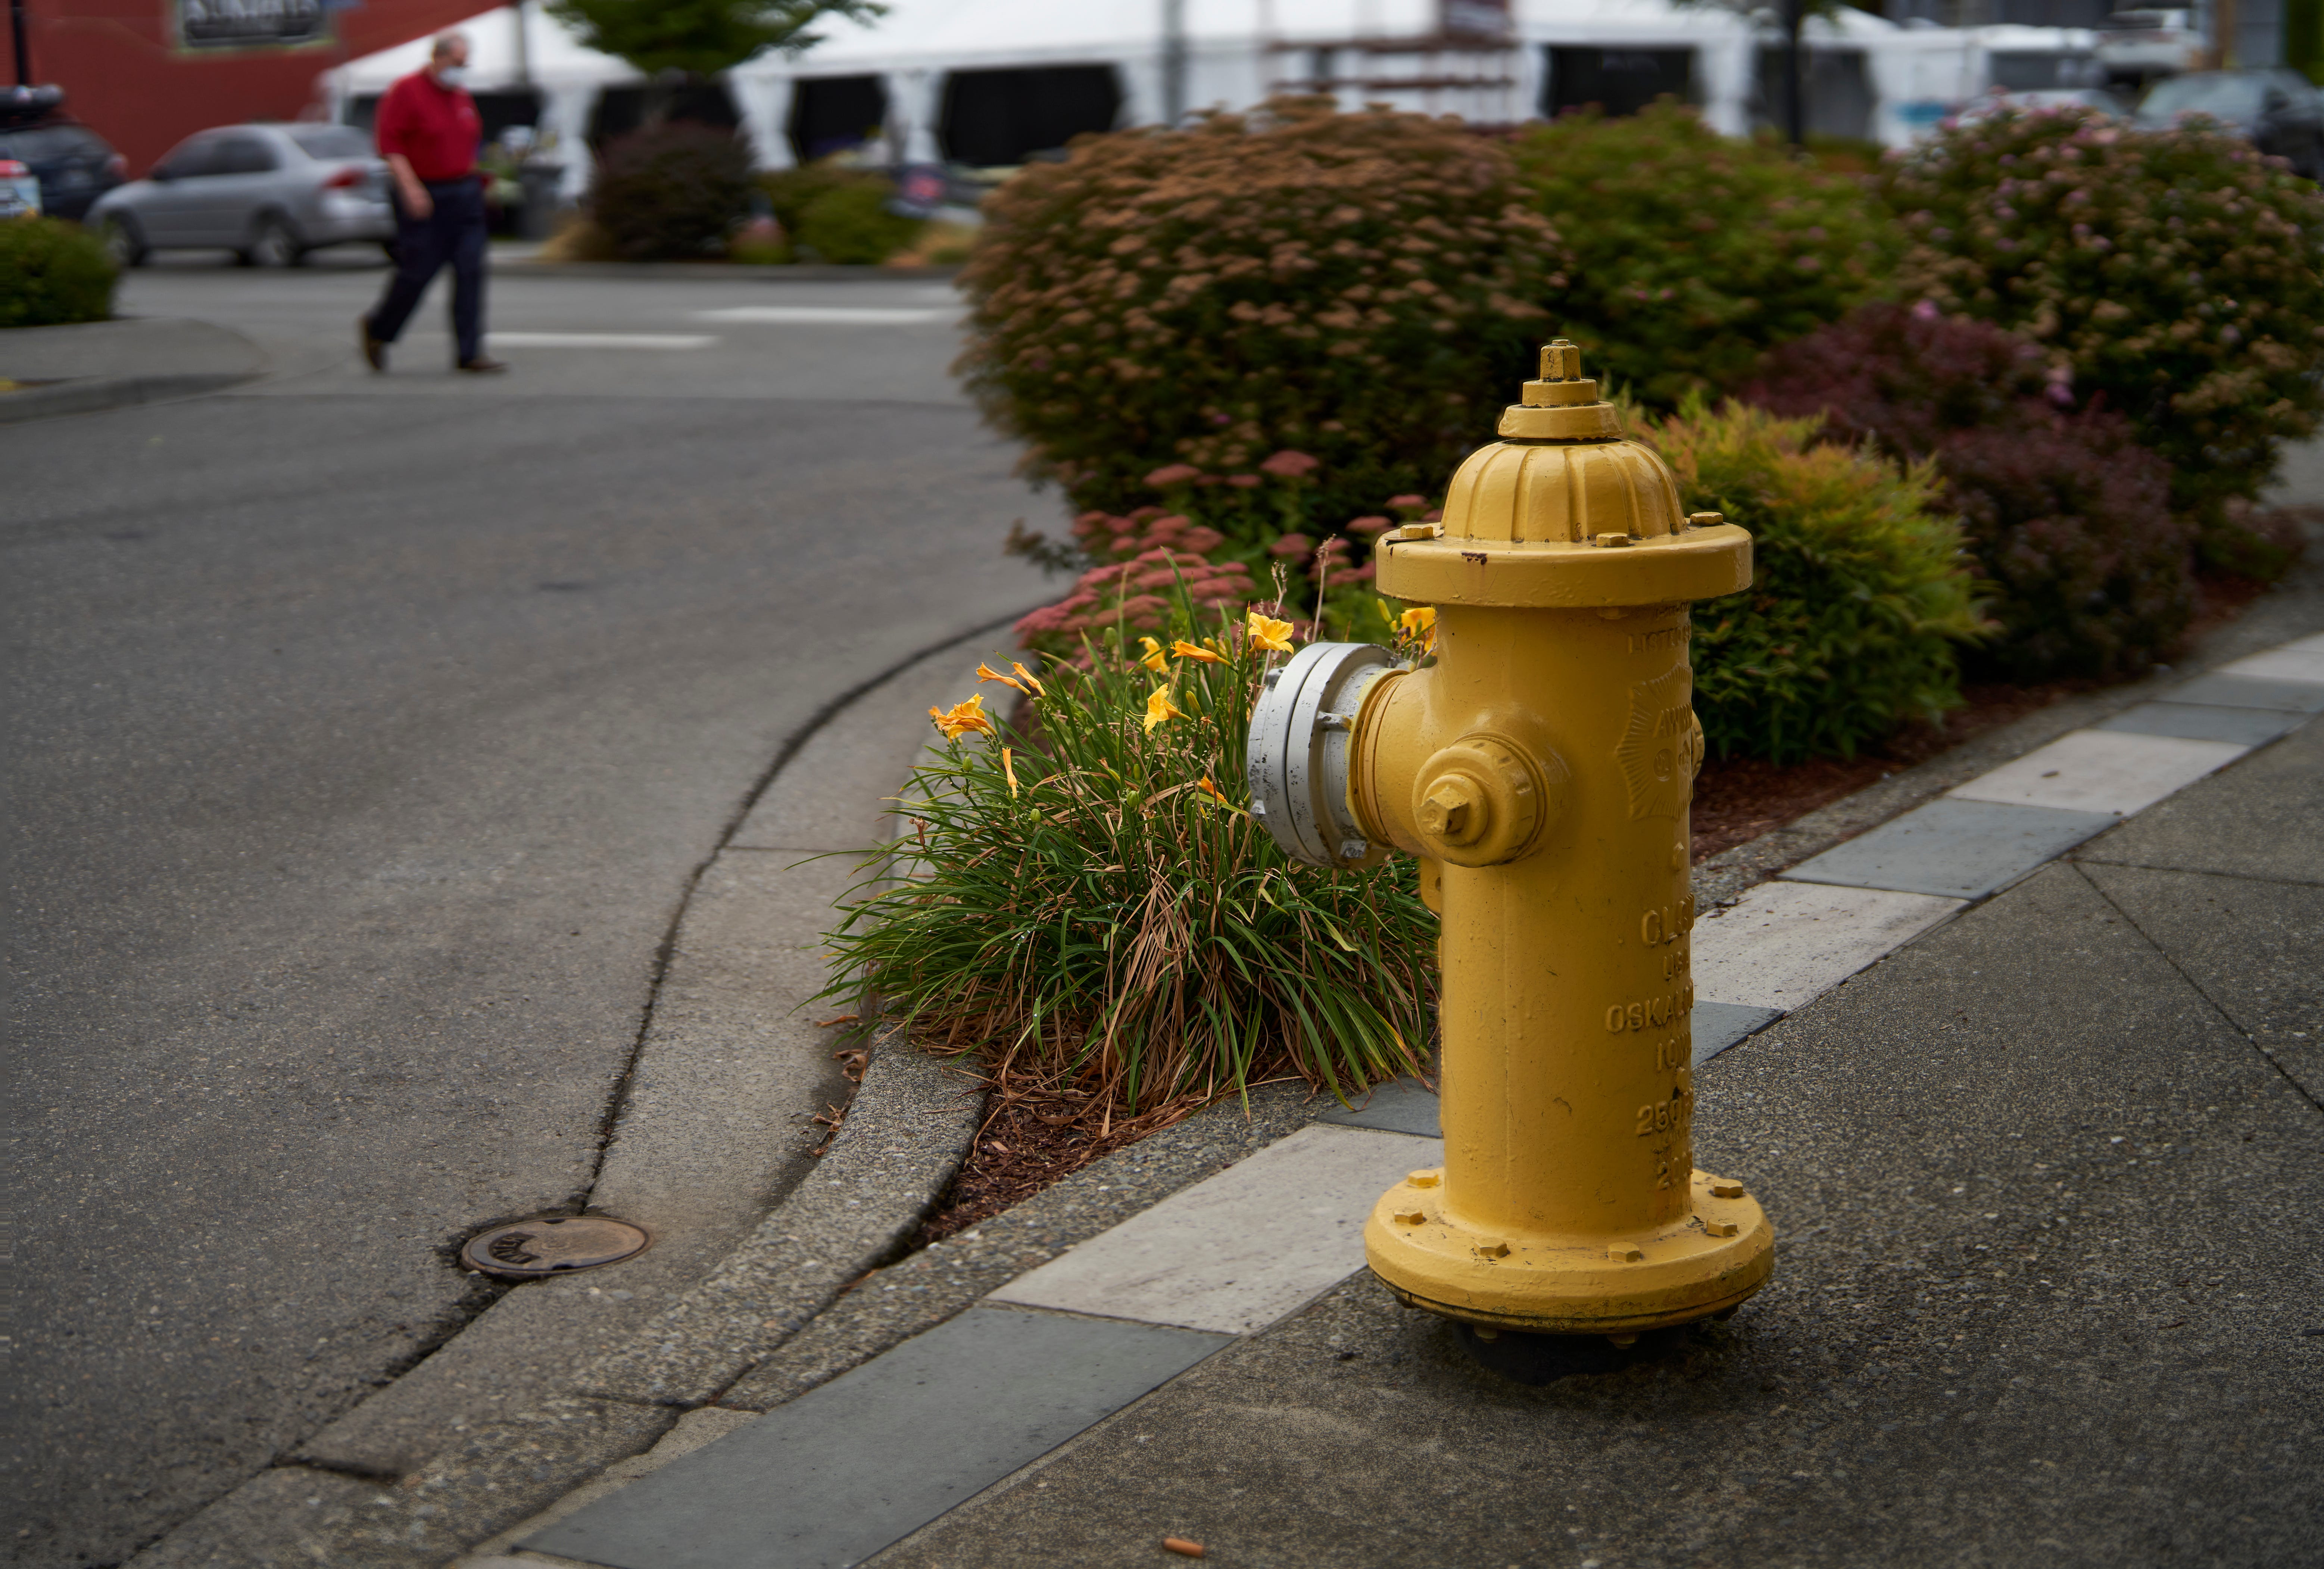
The photo of the hydrant is a composite of two images. Each image was shot at f/1.2 to limit depth of focus, then combined in a focus merge in Affinity Photo.
Let’s walk through the process. Below is an image with the fire hydrant in focus, and everything else pretty much out of focus.
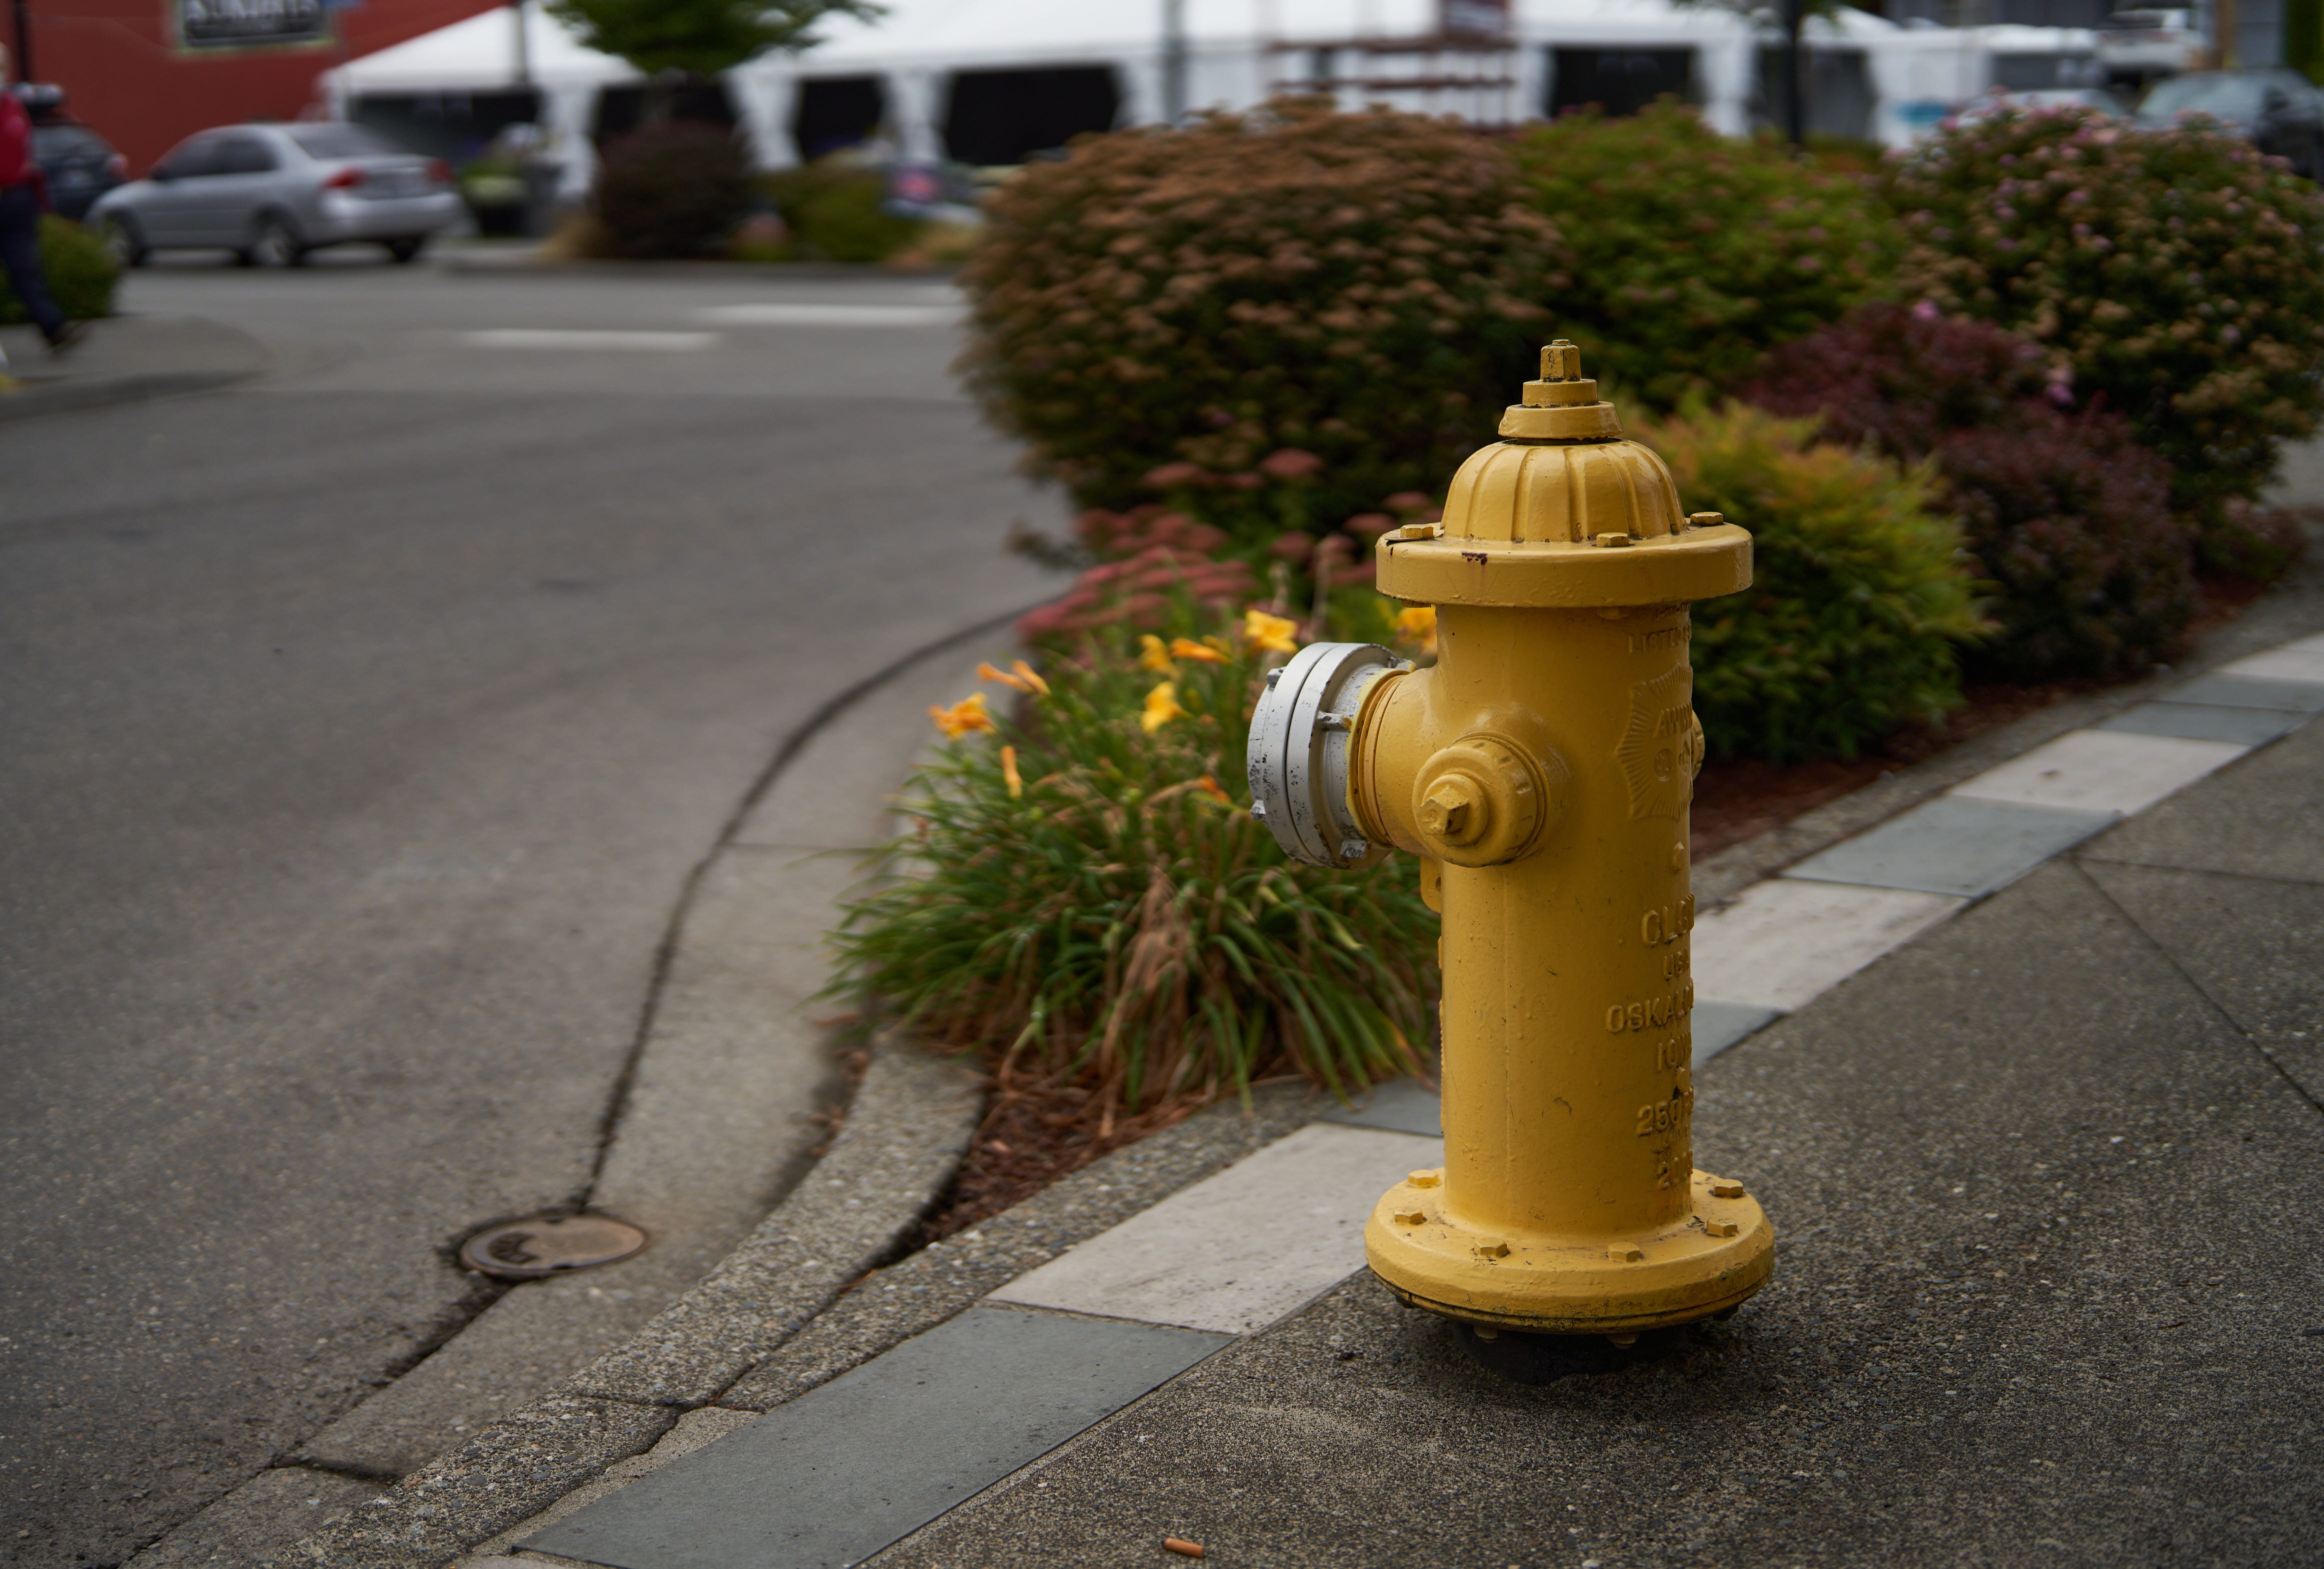
I didn’t like the way the flowers looked; they are only slightly out of focus, which makes them look odd. The choice would be to make the flowers even more fuzzy, or to include the flowers in the focus plane.
Let’s look at why one might choose one method or the other.
Make flowers more fuzzy
The camera was already at its widest aperture (f/1.2), so I could not use aperture to limit focus range.
But: the closer the camera is to the subject, the narrower the depth of focus will be. So if I wanted to make the flower more out of focus, I could have moved forward, closer to the hydrant. This would have changed the image: it would have made the hydrant larger in the frame, and it would make the flowers more out of focus. I also would have had to get lower, and with my old legs, that’s a difficult choice. :) So I did not take this route.
I also could have taken a step back, and taken a shot with the same focus settings, and then combine those two images. I didn’t think of this at the time, but it might have been a useful option.
Include flowers in focus plane
The usual way to expand the plane of focus would be to stop down the aperture. Here is what the plane of focus looks like with the flowers in focus at f/4.
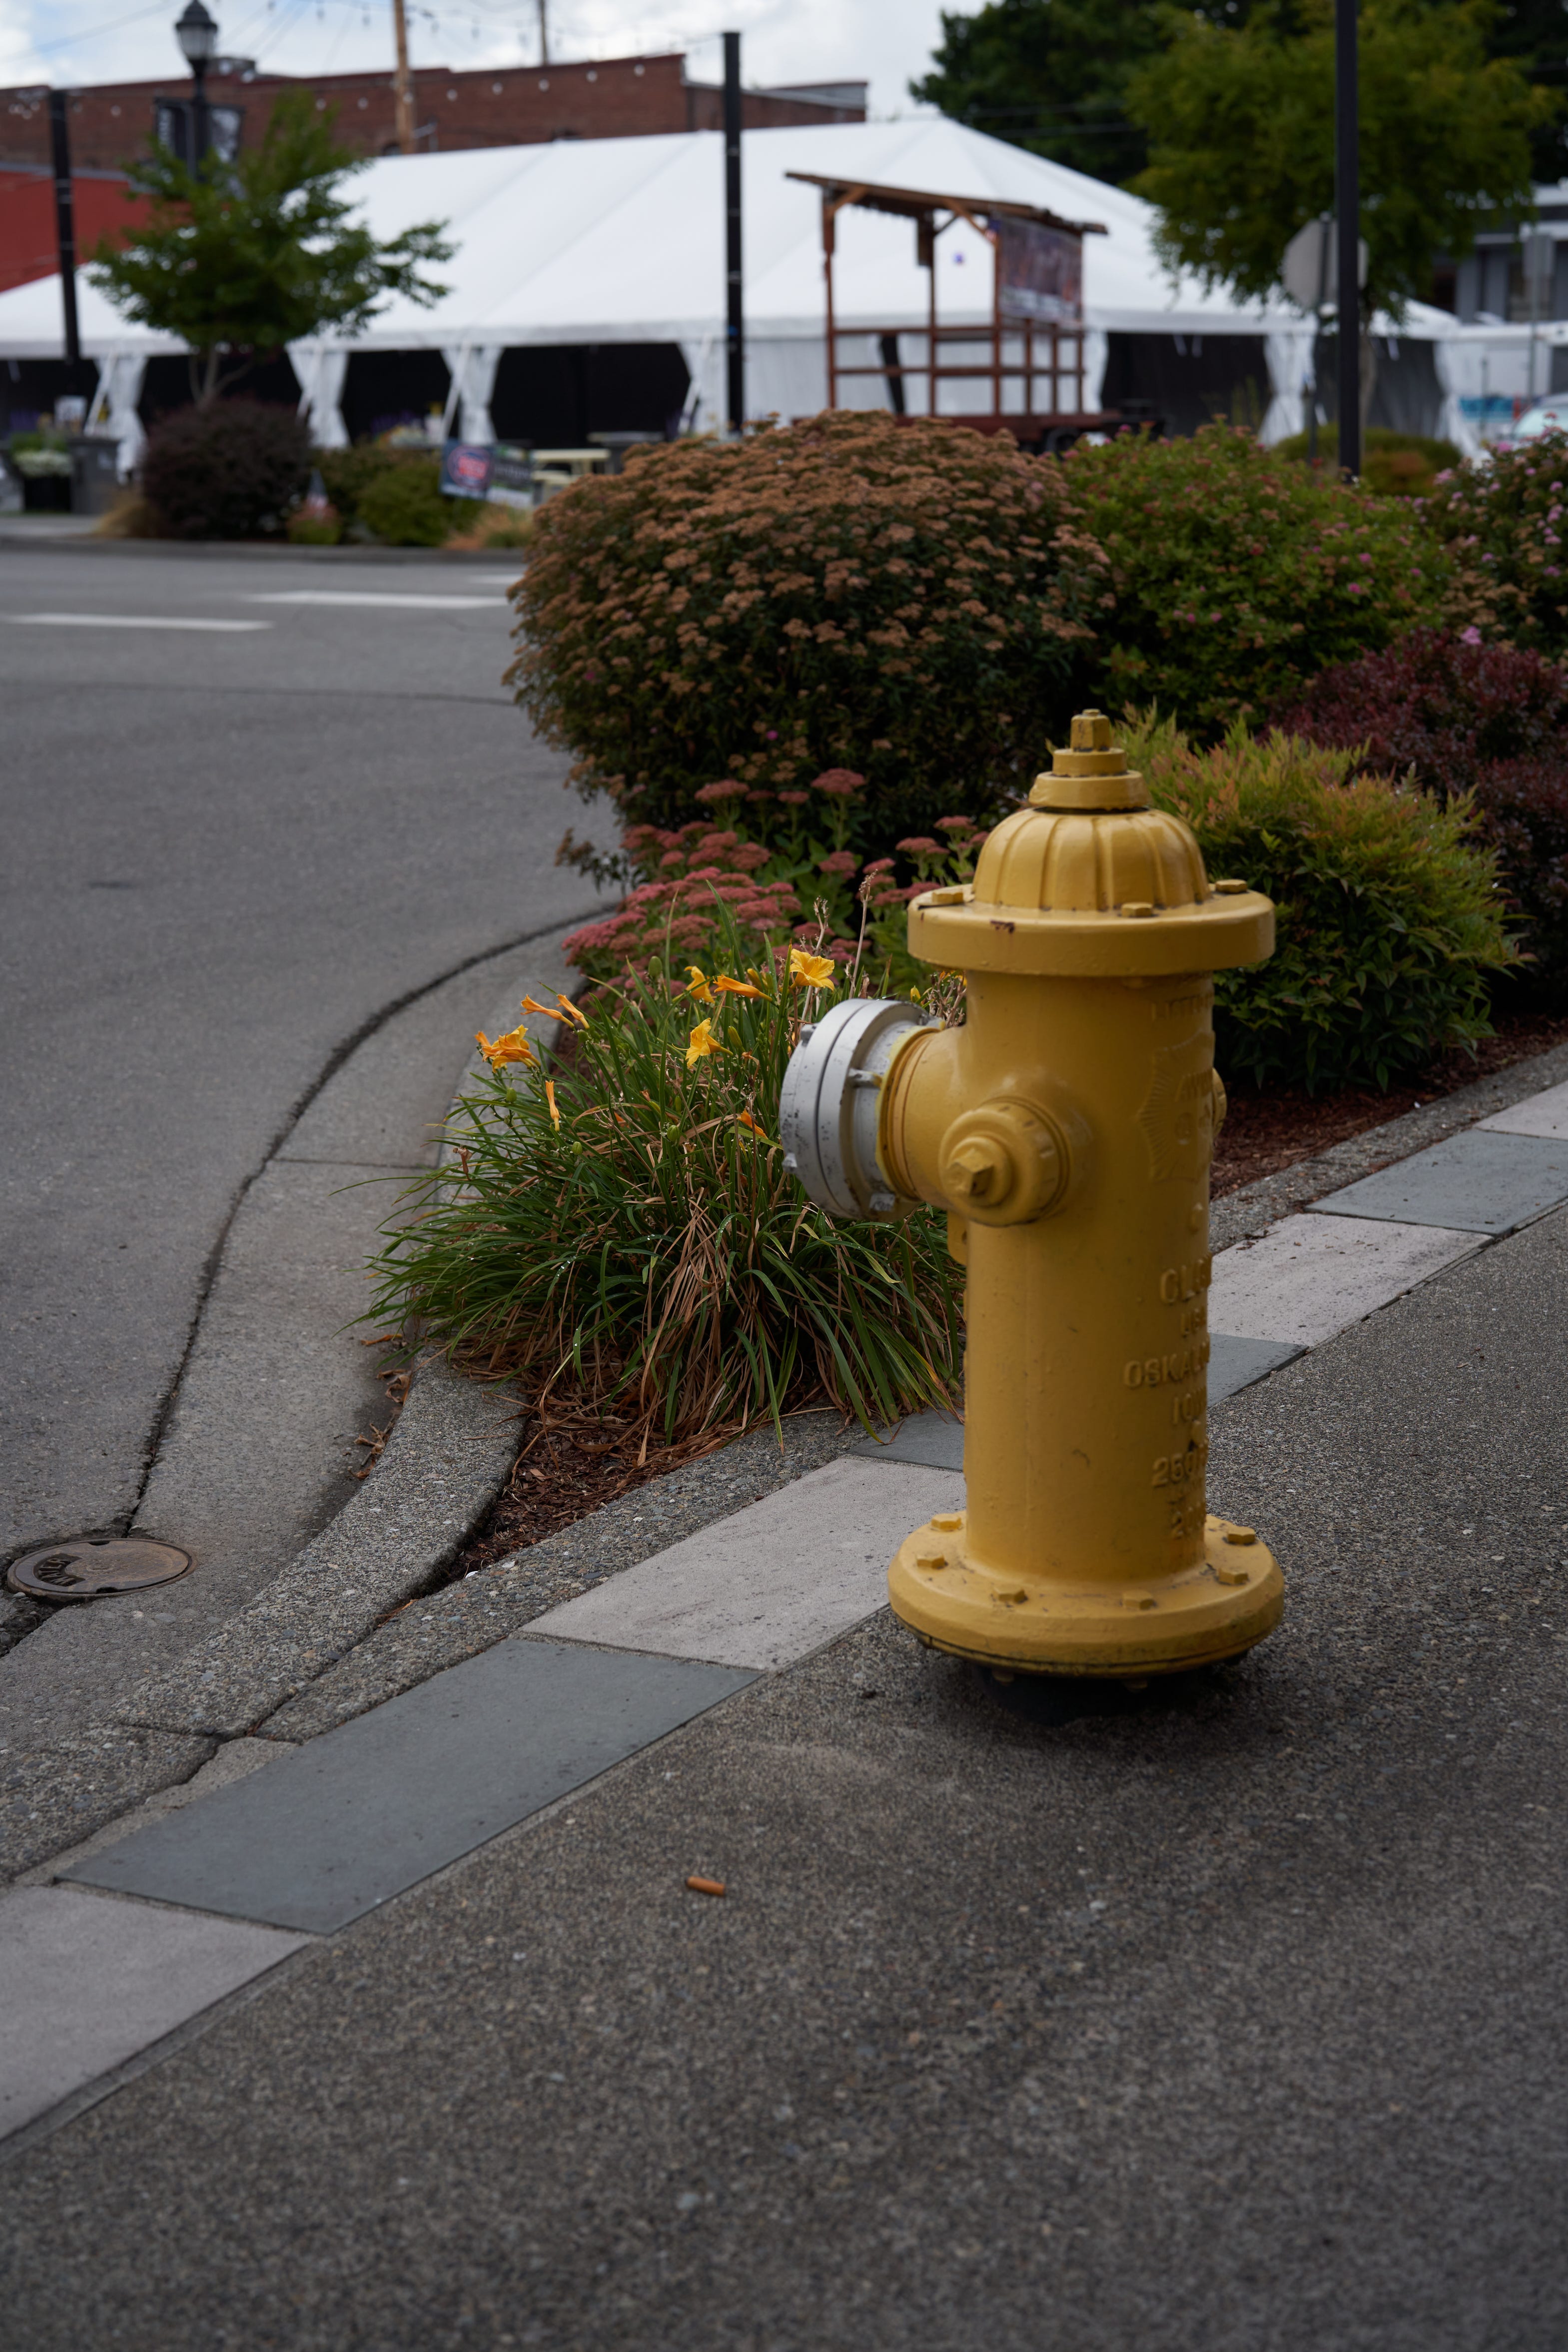
First, at f/4, the depth of focus still isn’t large enough for both flowers and hydrant. The flowers are focused; the nearest portions of the hydrant are slightly out of focus.
But everything in the image is better focused. The sense of background is changed; only the far background is far enough out of focus to feel like background. The subject has become the entire planting, rather that just the hydrant and/or flowers.
Using two images with narrow focus plane
The solution I chose was to take two images framed the same, and combine them using focus merge. I showed the hydrant image above; here is the flower image:
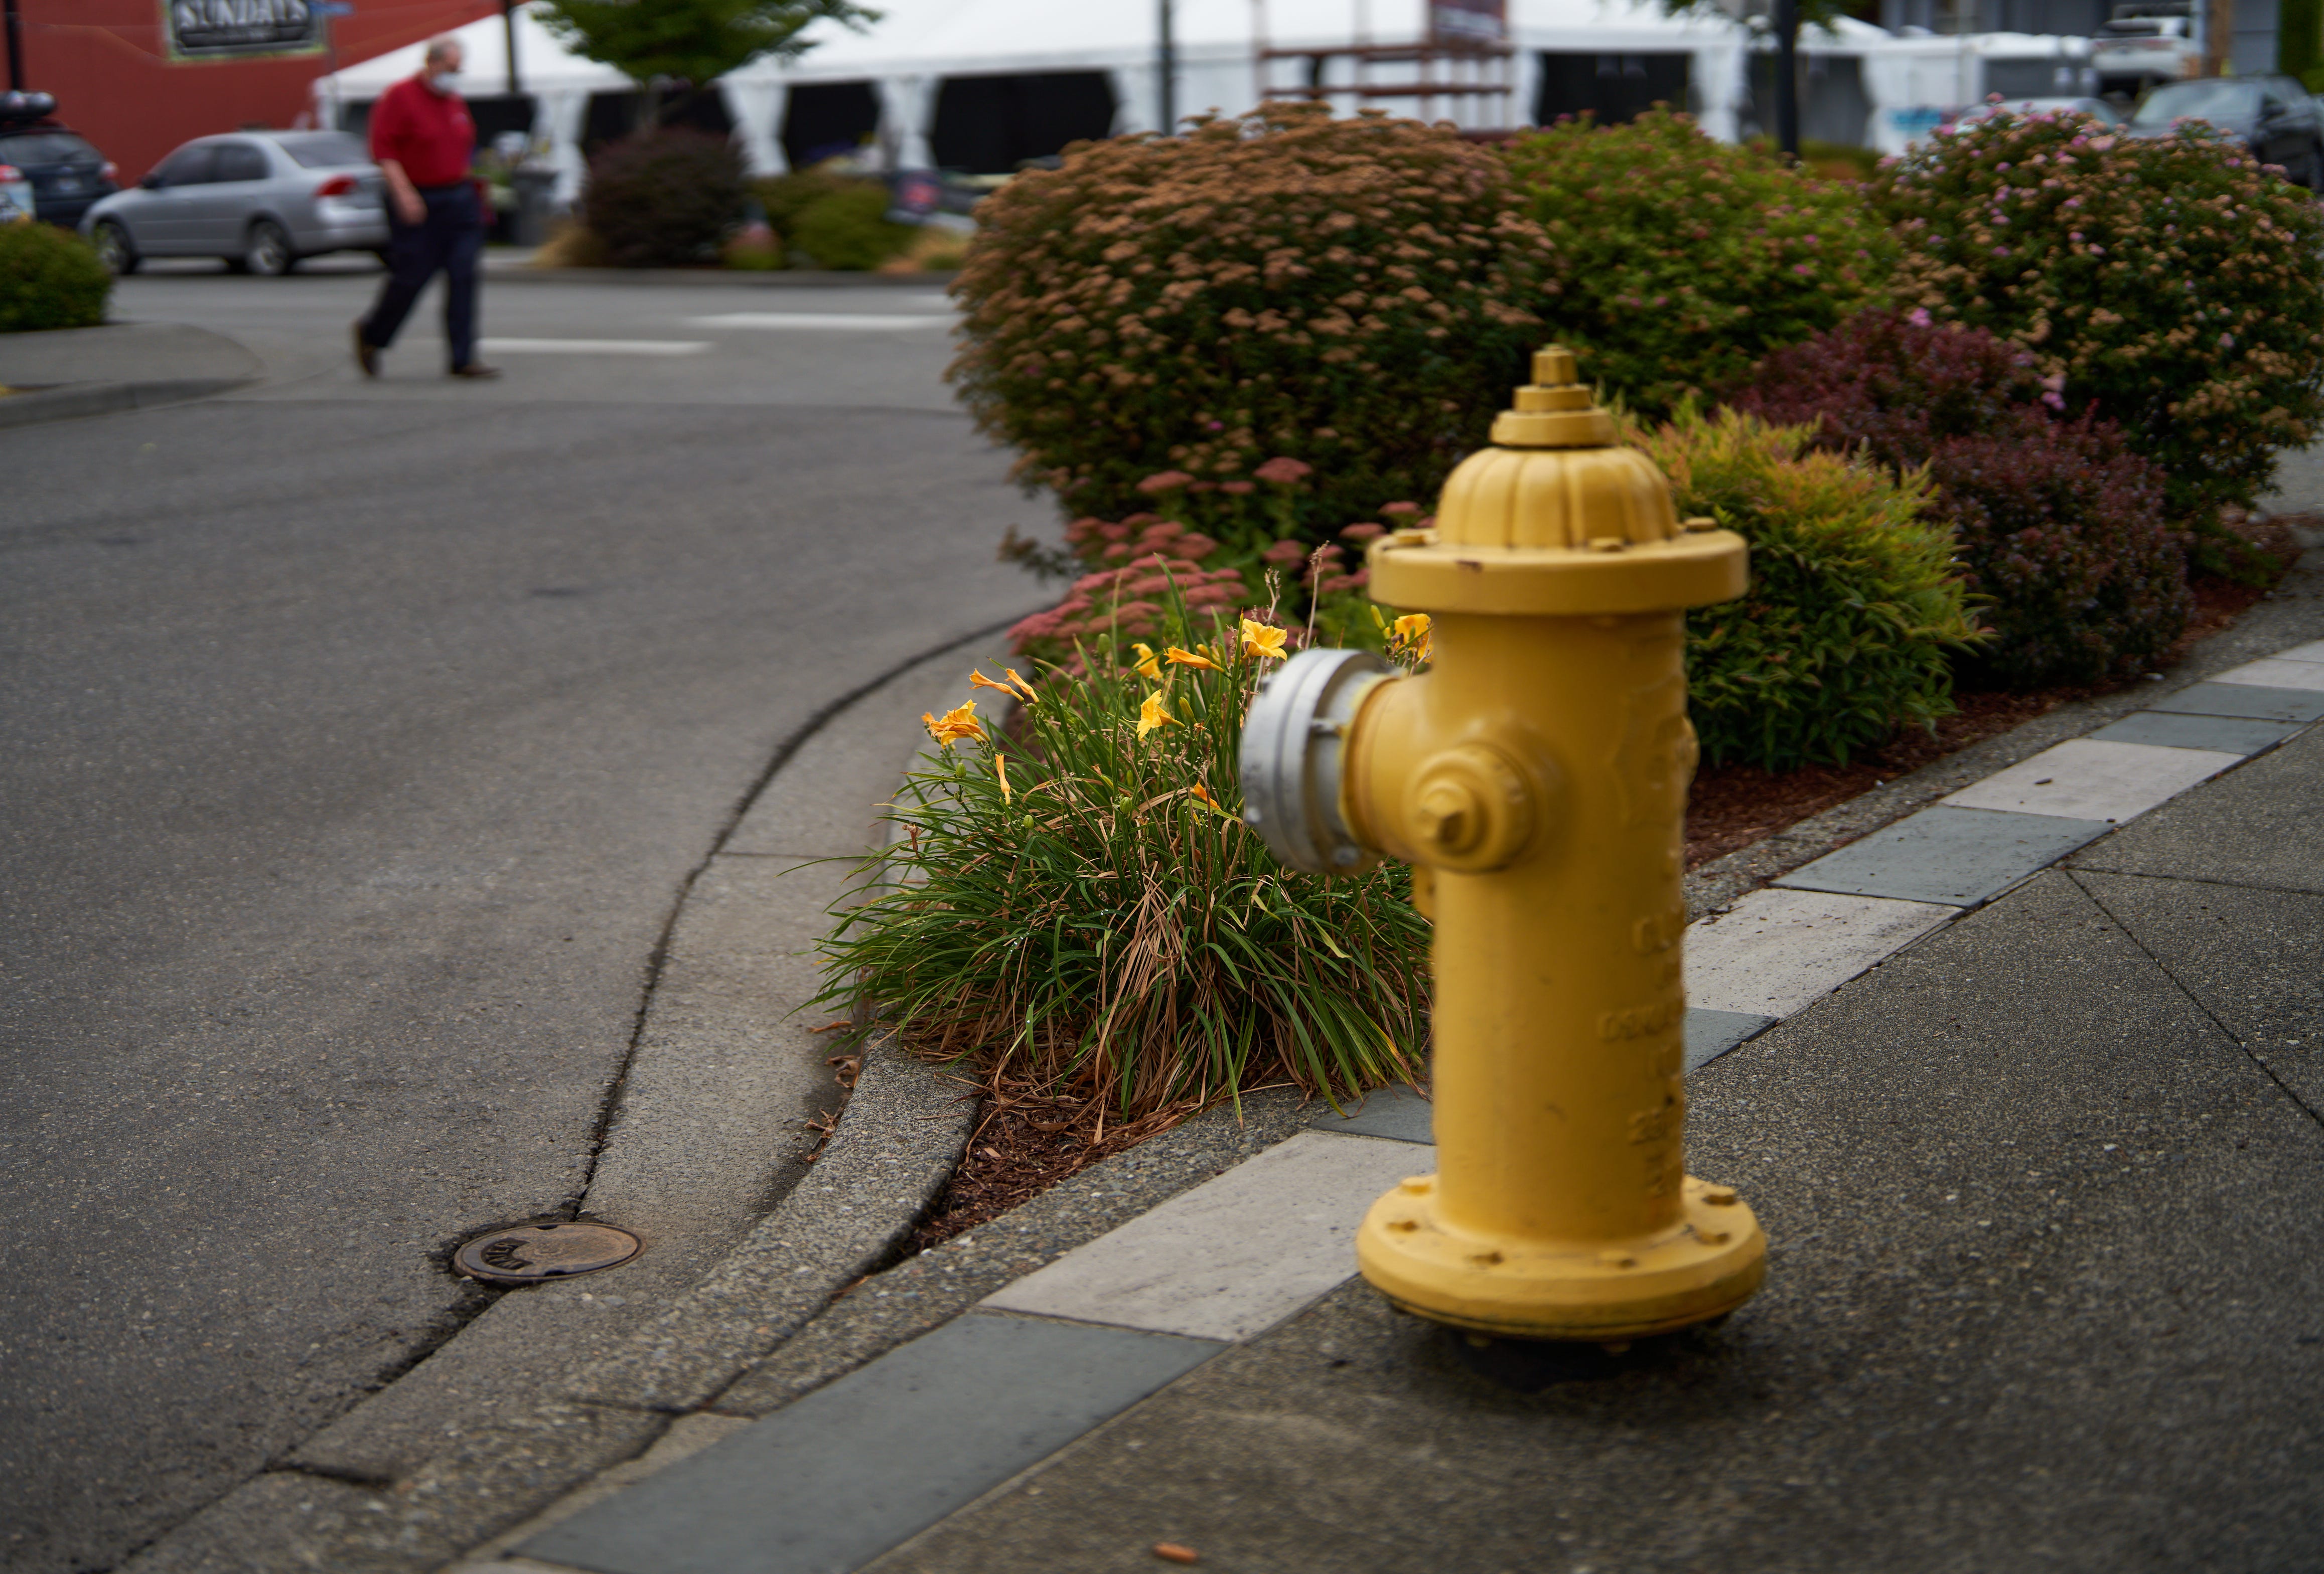
Notice that the background shrubs are a bit sharper, which happens when you focus further out; the focus plane widens with distance as mentioned earlier. The far background is also sharper than I liked. I dealt with these issues within the focus merge.
Focus Merge steps:
In Affinity Photo, I used the File -> New Focus Merge menu option to load the two images.
The combined image was not quite what I wanted. The automated process did some things I expect, and also did some weird things. The big weird thing was making the man in the red shirt transparent. Less obvious but important to me, it used the sharper shrubs from the image focused on the flower. So I used manual adjustment options to improve the result.
I selected the hydrant image (there’s a little window with a list of the images that were merged), and used the clone tool to put the fuzzier shrubs in the composite.
I also cleaned up the red shirt guy, made him actually in the image in the same way. I used different sized brushes and different levels of transparency to get the effect I wanted.
I also adjusted colors. I made the yellows in the image brighter, and increased their saturation a bit. I warmed up the white point a bit, using the crosswalk white paint as my reference for ‘true white’ in the image.
I had the option of removing the vignette, but left it in. Wide-open apertures often are slightly darker around the edge, and this can be removed using software. But I liked the way the vignette enclosed to subjects in the image. It puts the hydrant and flowers at the center of attention just a little bit more. Here is the image with the vignette removed; some may prefer it. There’s never just one way to do post on an image.
Note: these photos were all hand-held. Some of the images above were not corrected for rotation. I corrected rotation in the final image.