


Learning to Photograph a Forest
Is the issue "can't see the forest for the trees," or is it "too much stuff, whoa!"

I have been taking some photographs for the last few weeks, and…it is not going well. I need to take photos. But it’s winter, and the world is…not very colorful. There’s not much sunshine. Wah, wah, wah.
I came across some nice-looking winter forest photographs, and I finally learned a few things that will help me.
Let’s start with the primary problem with winter photography: there’s not a lot of colorful subjects to photograph. Shades of gray are (nearly) everywhere. There are other issues, too: sunshine can make any landscape look good, but in Seattle, we can go weeks, even months, without a lick of decent sunshine.
The article that showed me some new ways to think about the problem is here. (It’s behind a (tiny) paywall, I apologize.)
The lessons I draw from that article for my own photography are:
Find the color and emphasize it. It may be subtle, or small, or sometimes just something that I ignored (like red tips on branches of leafless trees). It’s out there, and if I expose carefully I will be able to increase saturation or otherwise emphasize the color that is there.
Watch out for chaotic colors. For example, OK; maybe the tips of the branches are red. But there may be green moss, yellow straw, and other subtle colors as well. I need to choose the right lens (focal length, sharpness) to grab the right portion of the scene so that the colors work. I need to process the image carefully, altering white balance, light level, etc. to bring out the colors that work.
Beware of textures. A texture can smother the shot, or it can create interest. It matters where it is in the image, how sharp or out of focus it is, what colors it contains, how it relates to the other part of the image, etc. Look for the right texture(s) to create a sense of presence and balance in the image. (You wouldn’t wear a paisley tie with paisley pants, right? At least I hope you wouldn’t.)
Find the solid objects. This is tricky. With so many things being some subtle shade of gray, can I find an object that stands out, or can I find a lens, or a place to shoot from, or a processing technique to make the size and shape and feel of the solid object have a presence in the shot? So find, yes, but also think about how I’m going to help the viewer see that object, too.
Think about how textures and objects interact visually. For example, let’s say I have a tree that is mostly covered in moss, and I want that to stand out against the texture and color of shrubs that are behind the tree on a mountainside. What can I do to make that work? Maybe the color of the moss on the tree, or its brightness level, is enough (but what if only some branches are dark???). Maybe the mountainside is far enough away that I can blur it by using a wide open lens aperture. Maybe there are evergreens on the mountainside, thick with dark green color, and the tree is light enough to stand out in reverse…the point is to think about such things while I am taking the shot.
Added to these considerations are the bigger things: time of day, amount of total light, directionality of light, presence of shadows (or not; I had a tough time shooting along a river recently with the sun at my back—I probably should have gotten there are few hours earlier). The environment dictates a fair amount of what is going on with light and opportunities.
So I took my camera out today and tried to see what I might be able to do with shooting landscape in winter in my area. I drove to a flood-control impoundment in Bonney Lake, WA that has been very frustrating for me to photograph. Wide angle shots haven’t worked, even though it’s a stand of forest with a multitude of tall trunks. Telephoto shots haven’t work because there’s not enough in the them to say anything interesting. And a regular lens is just giving me blah results.
Today, I took a 35mm lens and the medium format camera out to try wide angle again. However, this time, instead of standing back and seeing those long stretches of tall trees, I got inside the forest to see if that change in viewpoint helped.

The photo above has a new point of view: standing near the edge of the forest, where we can still see all those trees, but now looking out at the edge of nearby suburban homes. Also, the tripod is low to the ground, creating a sense of intimacy with the forest by including more nearby details. (A wide angle lens often benefits from having at least a few things close by so they are readily identified in the photo.)
The overall feel of the image is what makes it for me: looking at it, I’m taken back to the feeling of being in a special place, looking out safely at the threat of civilization.
The sky was literally a lucky bonus; I had to expose for the dark of the forest interior, and it nearly burned out the bright sky. Fortunately, I was working with the medium format camera, and it has some headroom for bright sky in a shot like this. I was able to pull those clouds back from the brink.
The lens was not ideal - there is a black corner at upper right; and the trees on the right curve a bit. Even so, after I clean up the black area, I think the photo works pretty well. It’s certainly better than anything else I’ve tried at that location. Flawed, but still a good learning experience.
The sense of depth is also important in this photo. The stump and tree in the foreground anchor the shot. The lens is able to resolve details in the distant background. These two facts work together to give shape to the little universe of the photo.
Is that the best possible shot? Of course not—there are multiple technical issues that have to be dealt with. But the shot has a feel to it, a point of view, and so it’s a good shot, and helps me understand how I can do better in the future.
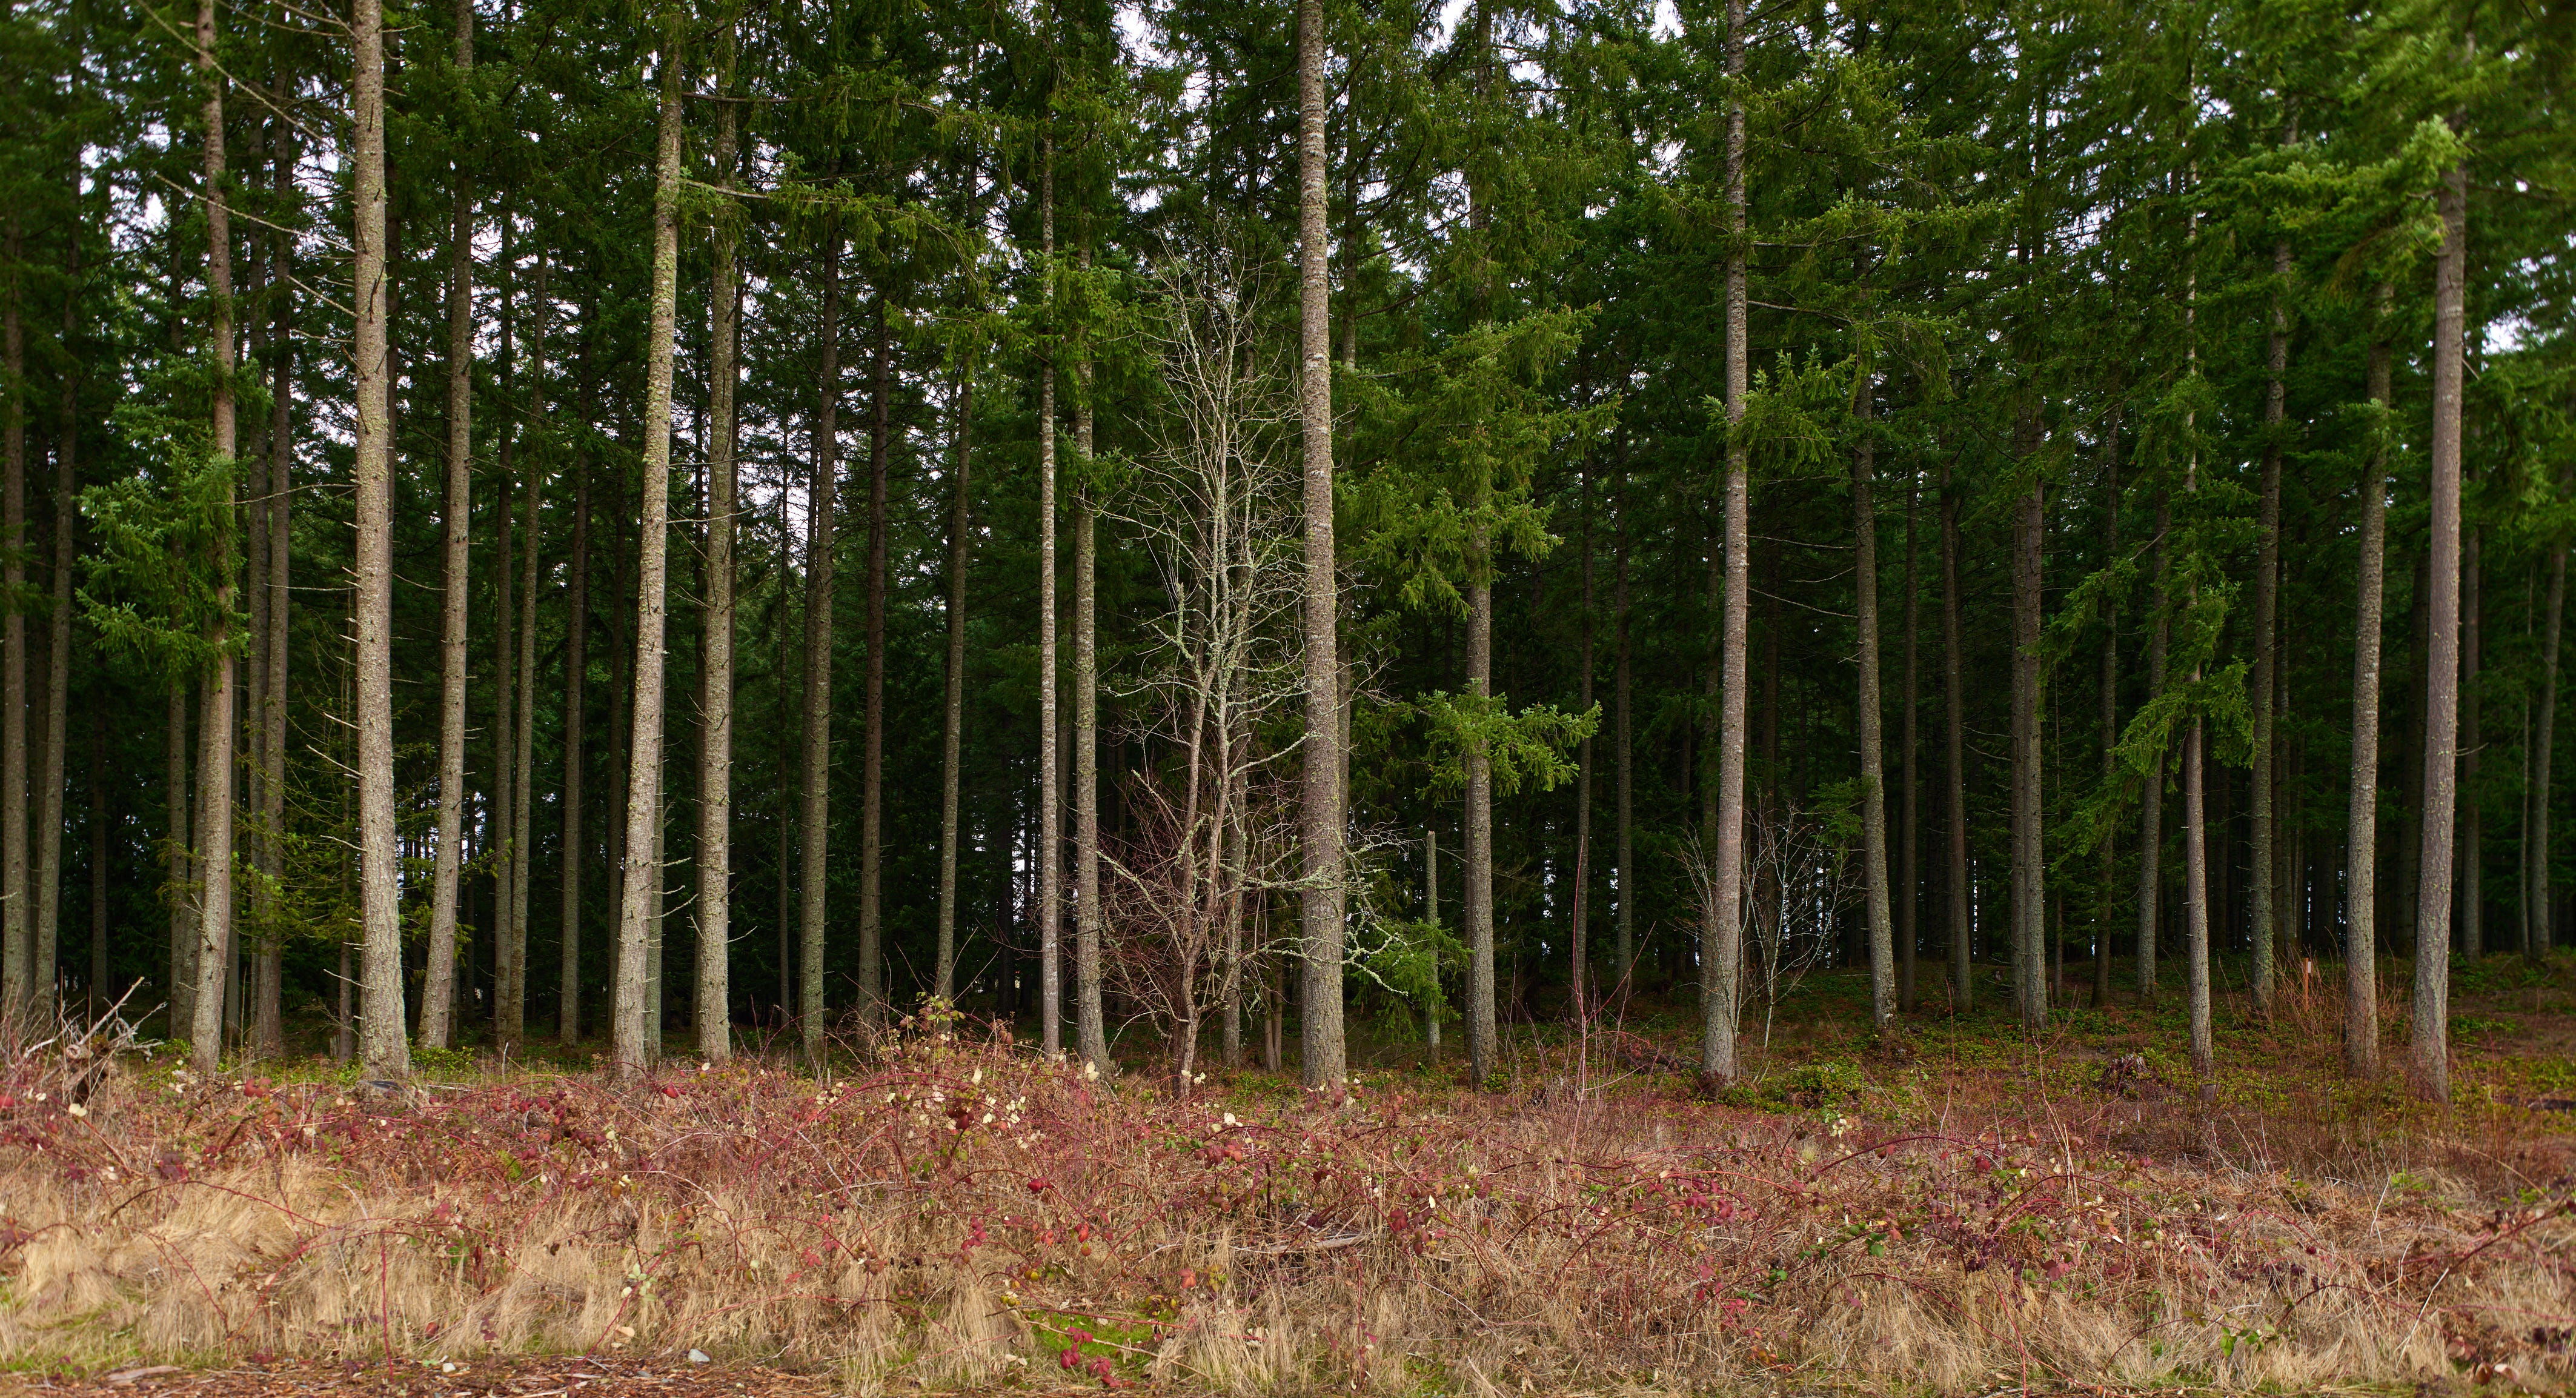
Above is the first shot I took in the session. I walked across the impoundment, right up to the edge of the forest. You can see the canes of blackberry bushes in the immediate foreground, lots of tall evergreens, and a weathered little deciduous tree (I won’t hazard a guess at the species) near center.
This was a literal and simple-minded attempt to try out the new ideas. Get closer to the big trees; check. Find an object of interest and frame it in the photograph; check. Find possible textures and include them (blackberry canes + grass), check. Not complex, not deep, just a good simple photograph organized around a handy subject. Nothing is extraordinary in it, but it gave me some confidence to dig a bit more on shots like the one up top.
Given that I had been taking a lot of disappointing shots, this was a great start. I may be offering myself faint praise, but I do like this shot. ;)
Finally, let’s look at an older shot that, for me at least, doesn’t really take off the way I would like it to.

A lot of the same issues here: busy background, trying to isolate a tree against that background, and something that I expected to work better than it does: cool bluish rocks at the base of the photo. The whole organization of the photo just doesn’t feel to me like it has much energy. I haven’t managed to frame the shot or organize the contents in a way that I like. It’s not some terrible shot, it just feels to me like it has its pants on backwards or something like that. ;)
I’ll be going back to that spot and trying to see if I can view that scene in a new way that pulls it together better. The red branches in the lower third, the shade on the rocks, the dark moss on the tree, the big evergreens in the far distance: there’s got to be something better I can do with that shot.