Moon
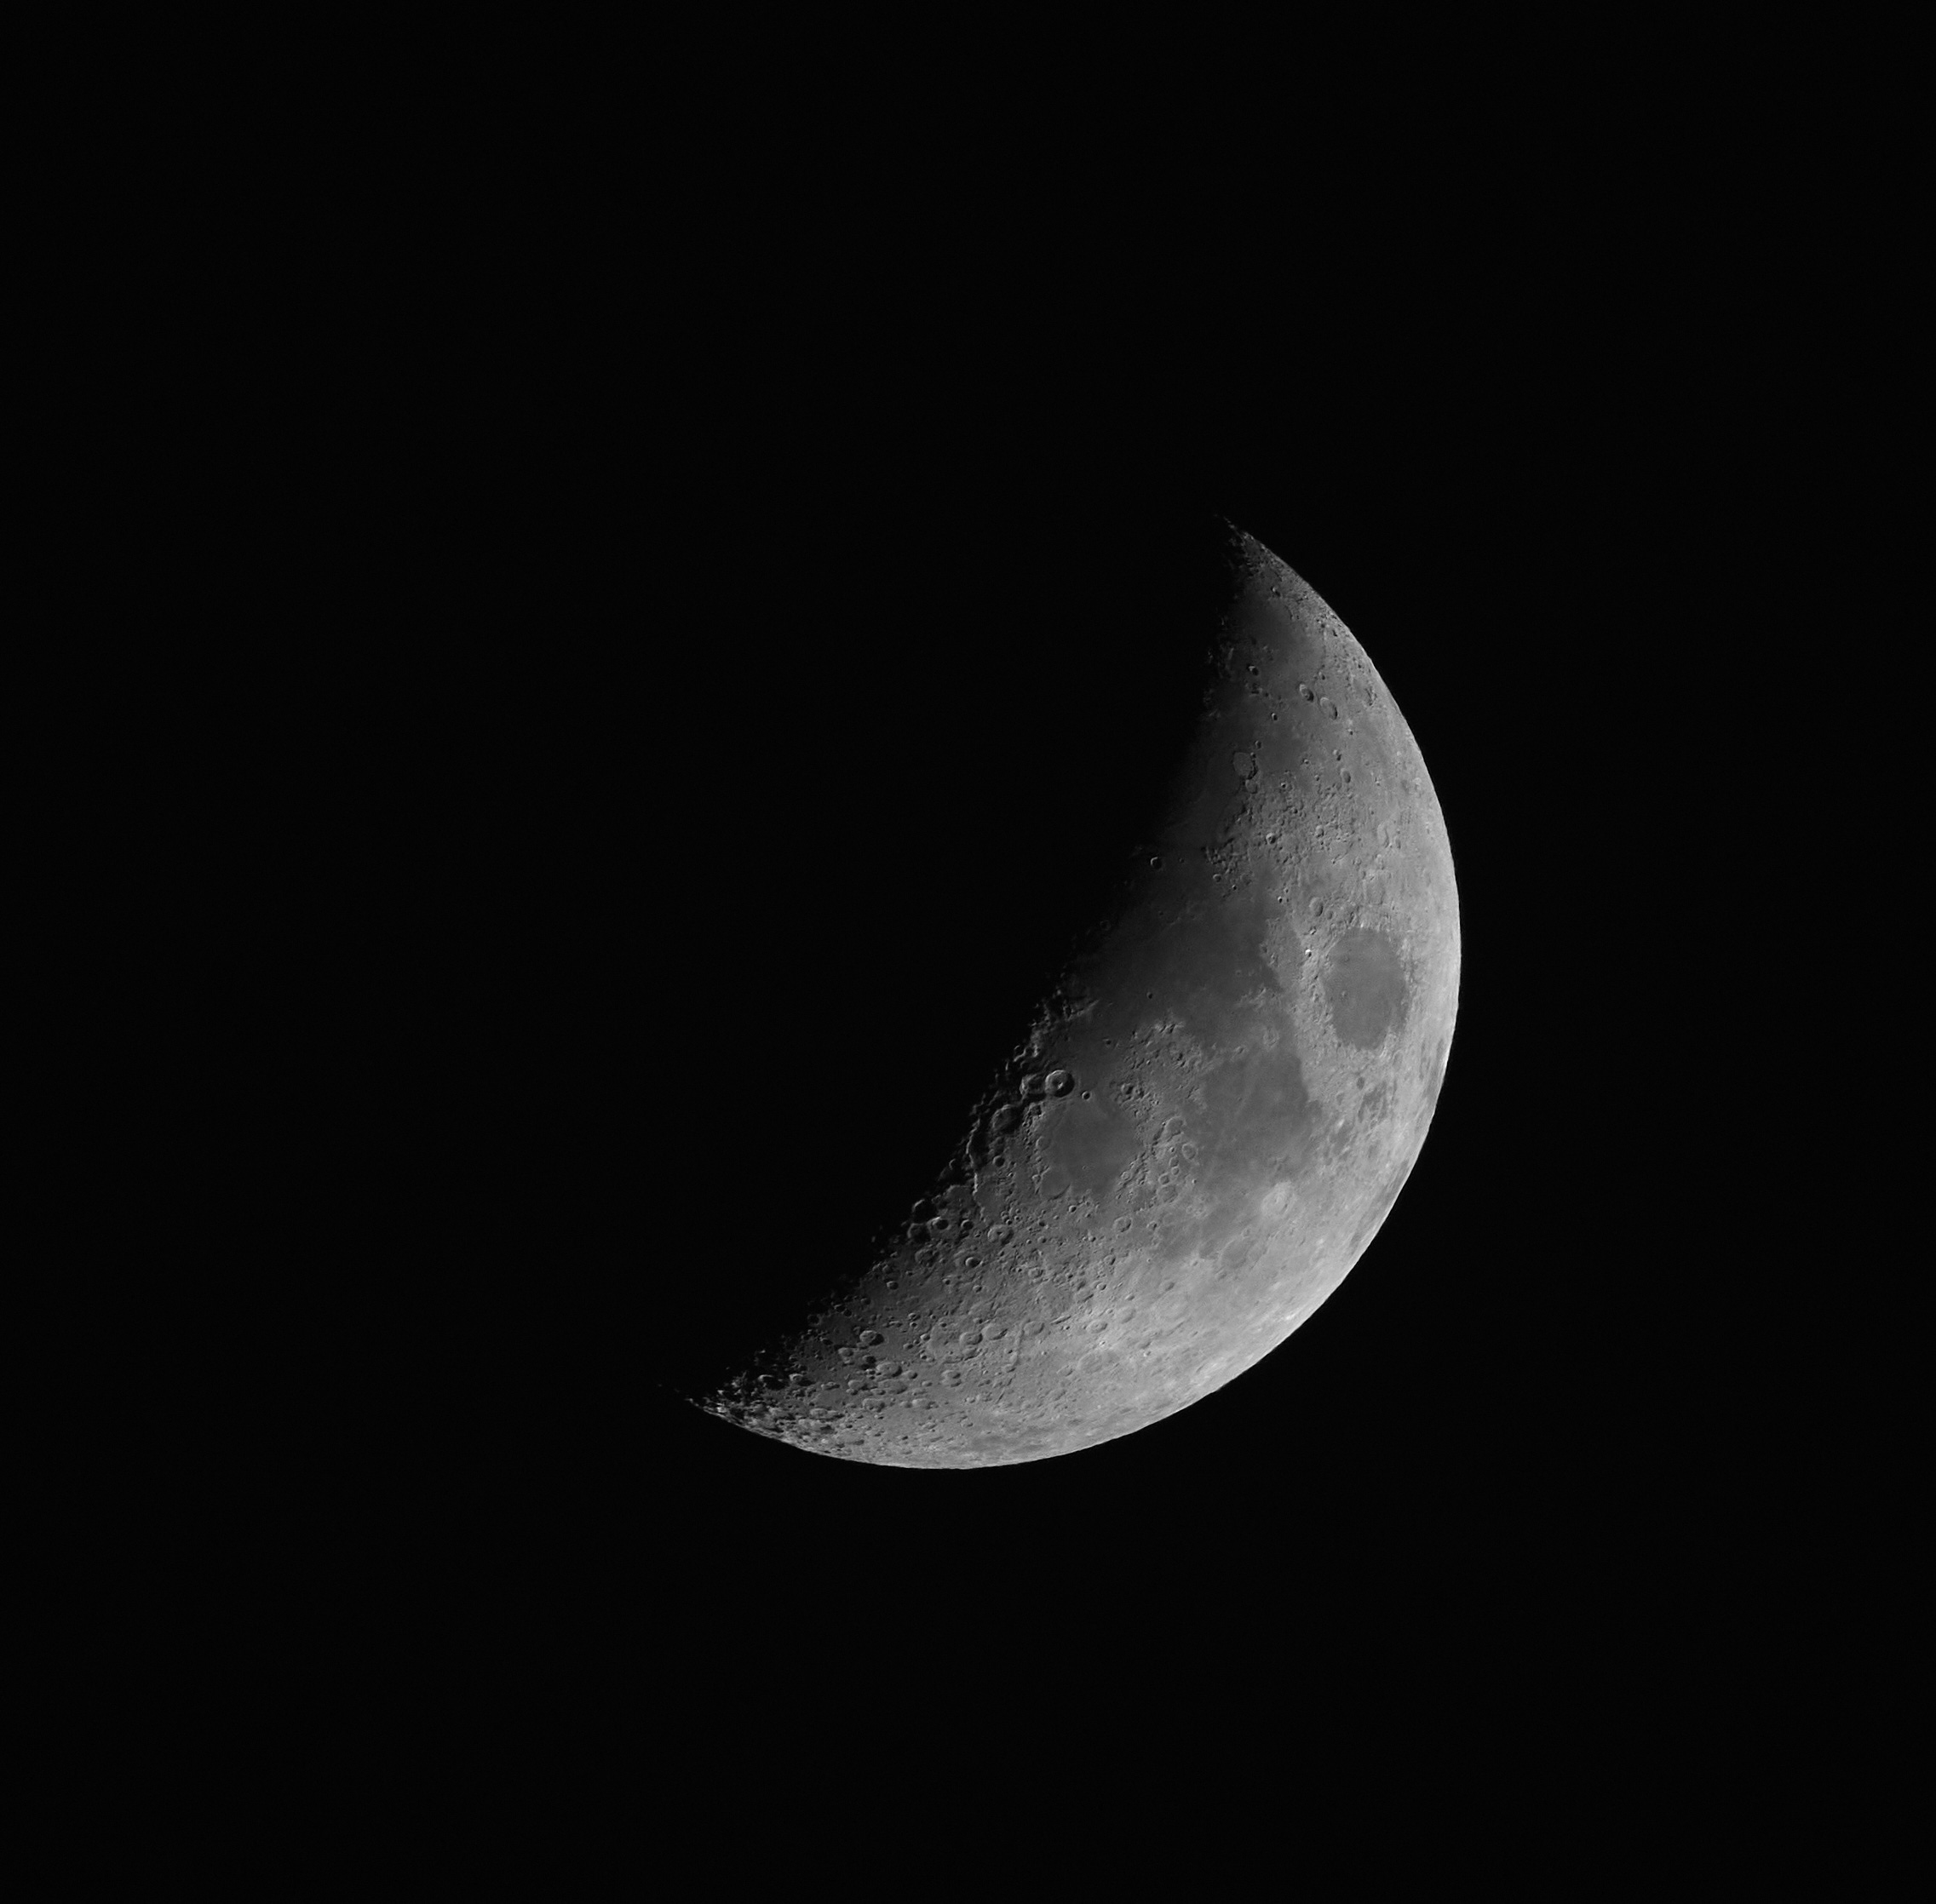
A photo of the moon with a very, very sharp lens

I rented a telephoto lens to test as one I could use for birding. I have a specific budget in mind, so I am not going to go out and buy a true high-end telephoto; those run more than $10,000—that’s a bit rich for my blood, to say the least. In case anyone is interesting in obtaining a reasonably priced (but still very expensive) birding lens, read on for details.
I rented a Canon 400mm f/4 DO II lens:
400mm is considered a decent telephoto focal length, but it’s actually somewhat short for serious birding purposes. Those gorgeous shots you see of terns, gulls, cranes, etc. are typically taken with lenses that have longer focal lengths. 600mm, 800mm, even 1200mm. Those are the real heavy iron of professional bird photographers. None of those are in my league. Pricewise, if I want a new lens (see discussion below on used), 400mm is about as long a lens as I can get if I want really good quality.
f/4 is not the ‘fastest’ 400mm birding lens. The very best 400mm lenses let in double the light (f/2.8). More light is extremely valuable, but the simple truth is that I can’t afford it.
DO stands for ‘diffractive optics’, a type of lens that uses very fancy cutting-edge design to provide a lighter weight lens. They are also cheaper to make than ‘real’ lenses. Short version: a diffractive optic uses ridges cut into the elements to focus the light, instead of (or in addition to) curved surfaces. They are tiny, they don’t have a huge impact on image quality, but not all diffractive optic telephotos perform extremely well. This one from Canon seems to be the best available (I’ve tried the others over the last few years).
II means that this is the second version of Canon’s diffractive optics 400mm lens. It’s a lot better than the original version; based on my initial tests today, it’s pretty much state of the art.
As you can see from the photo of the moon above, this things is dead sharp. I’ve used maybe half a dozen telephoto lenses (and numerous telescopes over the years), and this is extremely sharp and accurate. Very impressive.
You’ll note that the top photo is black and white. But the original shots are all done in color. It’s worth noting that I took these shots in daytime, when the air is quite blue. Removing color from the image gets rid of the blue cast.
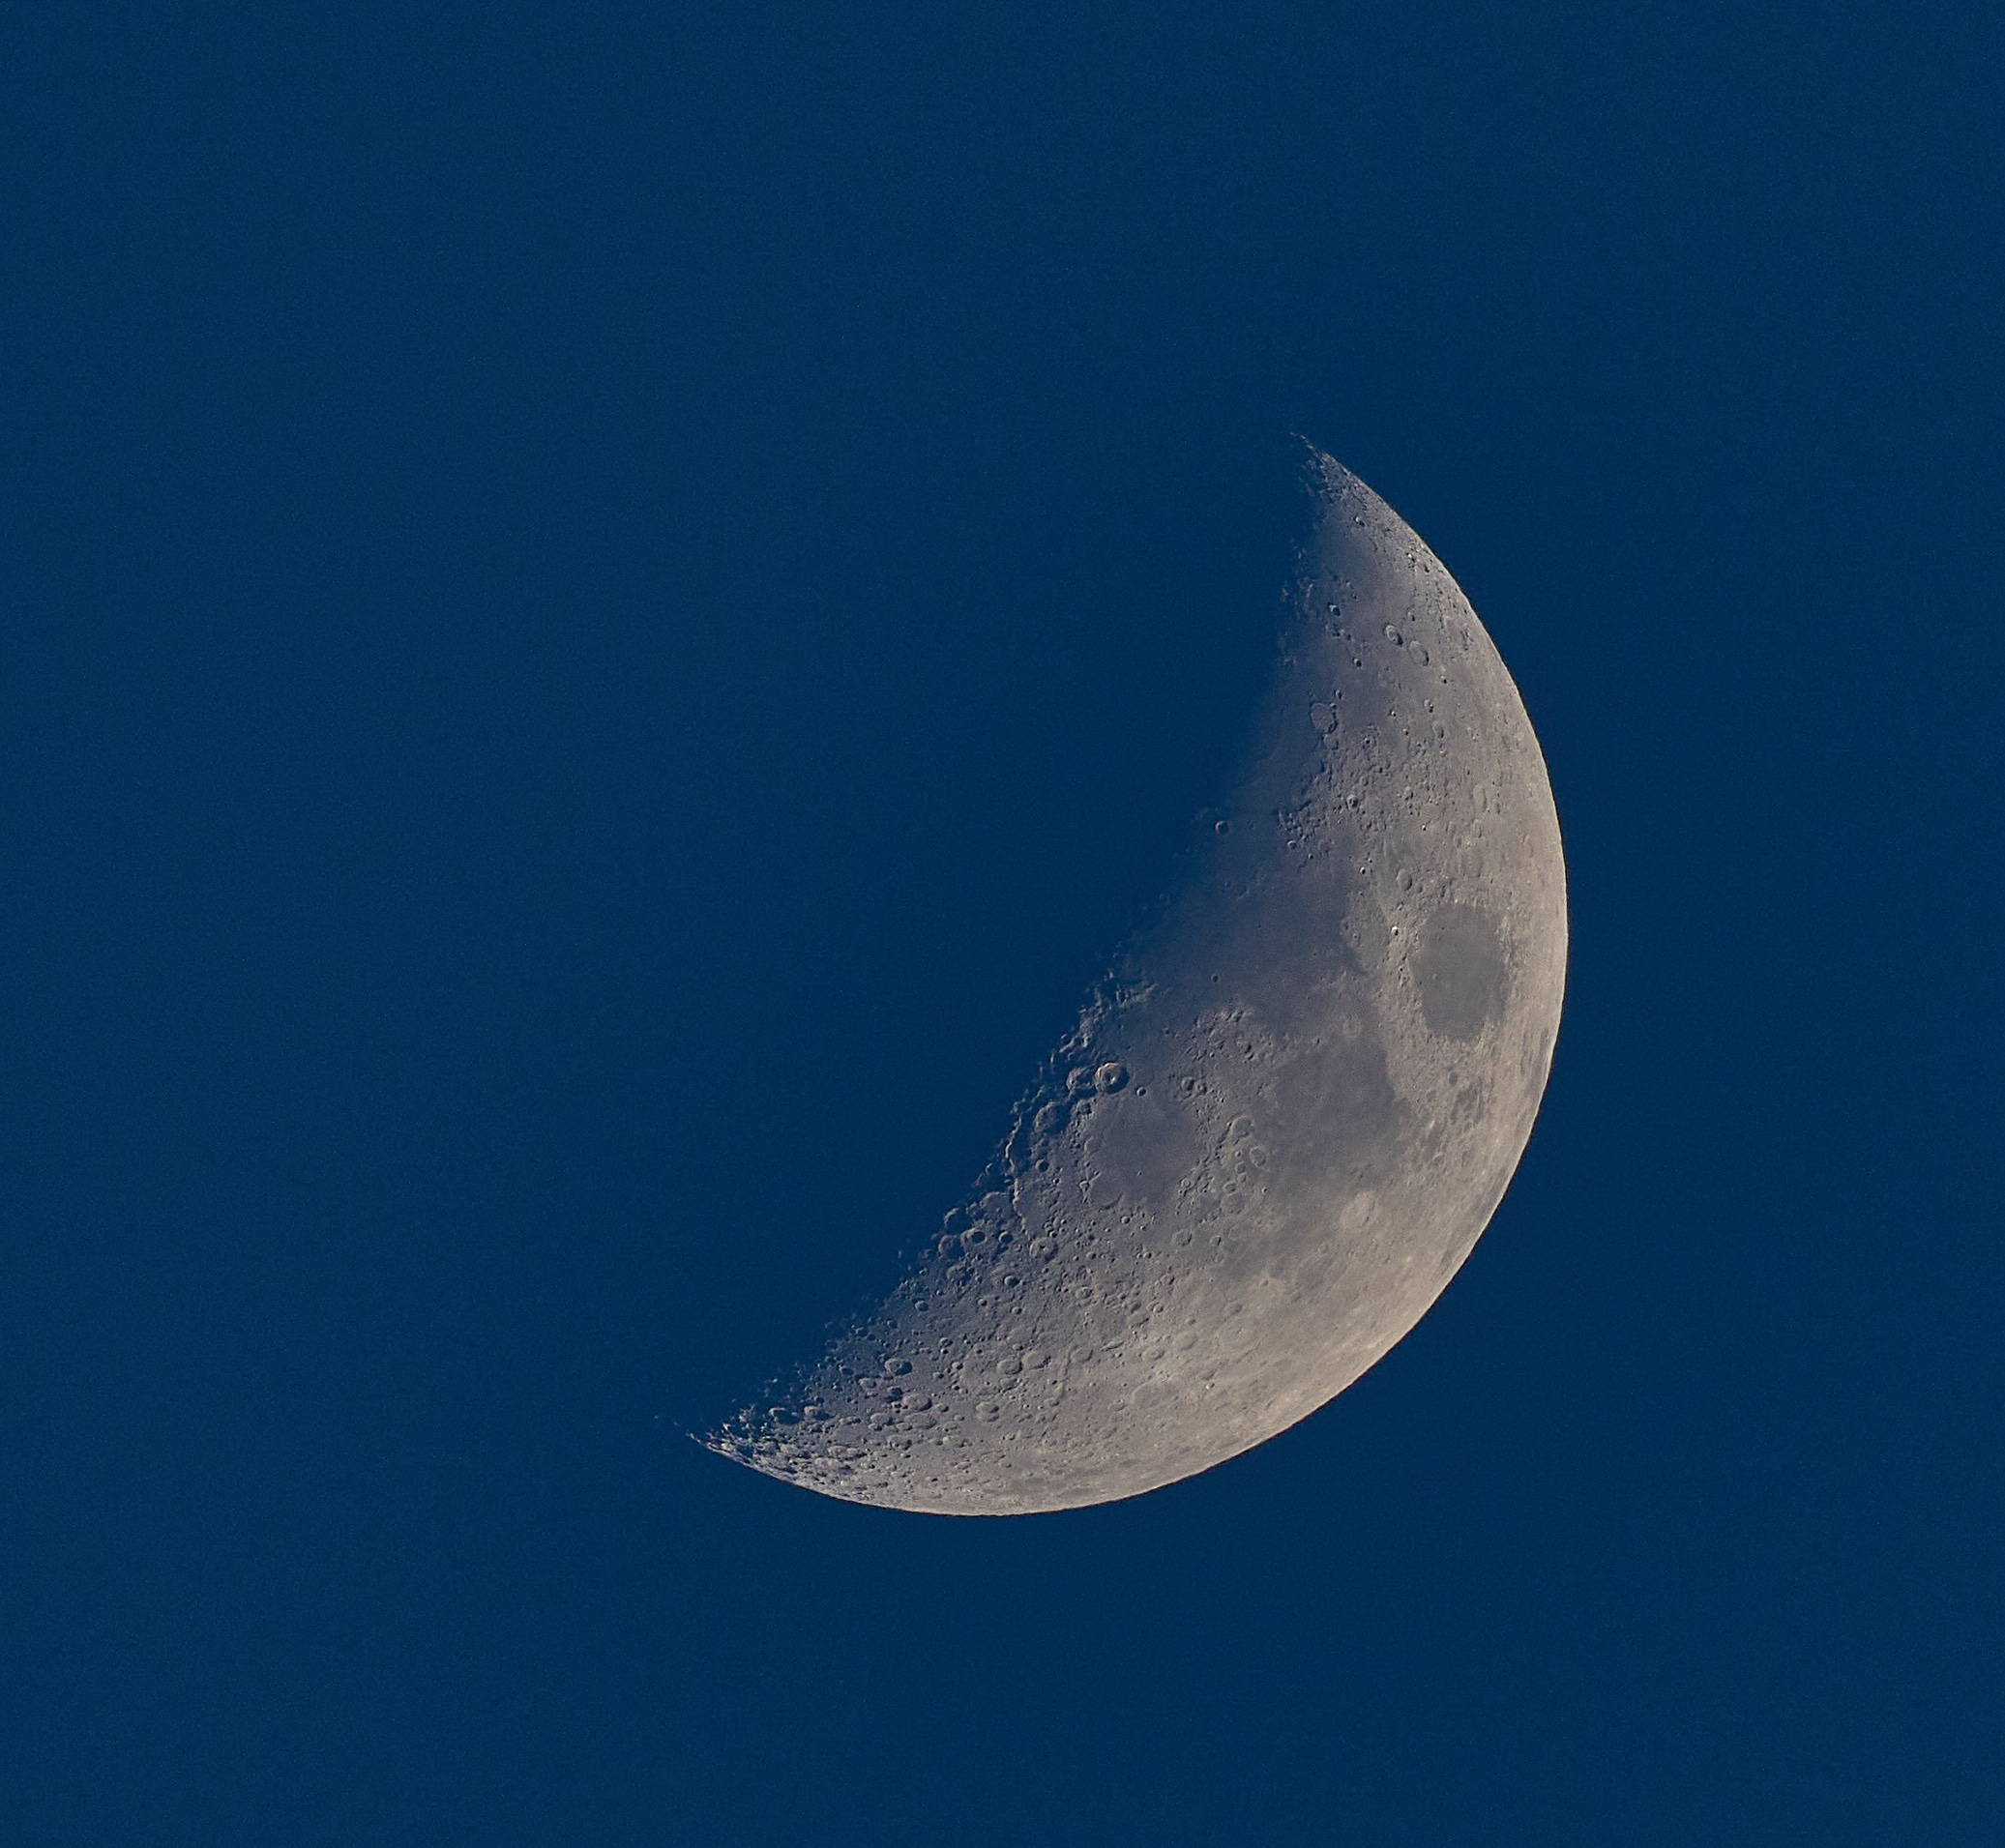
The photo above is the original color, but with the sky darkened. The sky was actually bright blue, and the moon was somewhat washed out. Even so, this lens is so sharp that the details still look very nice.
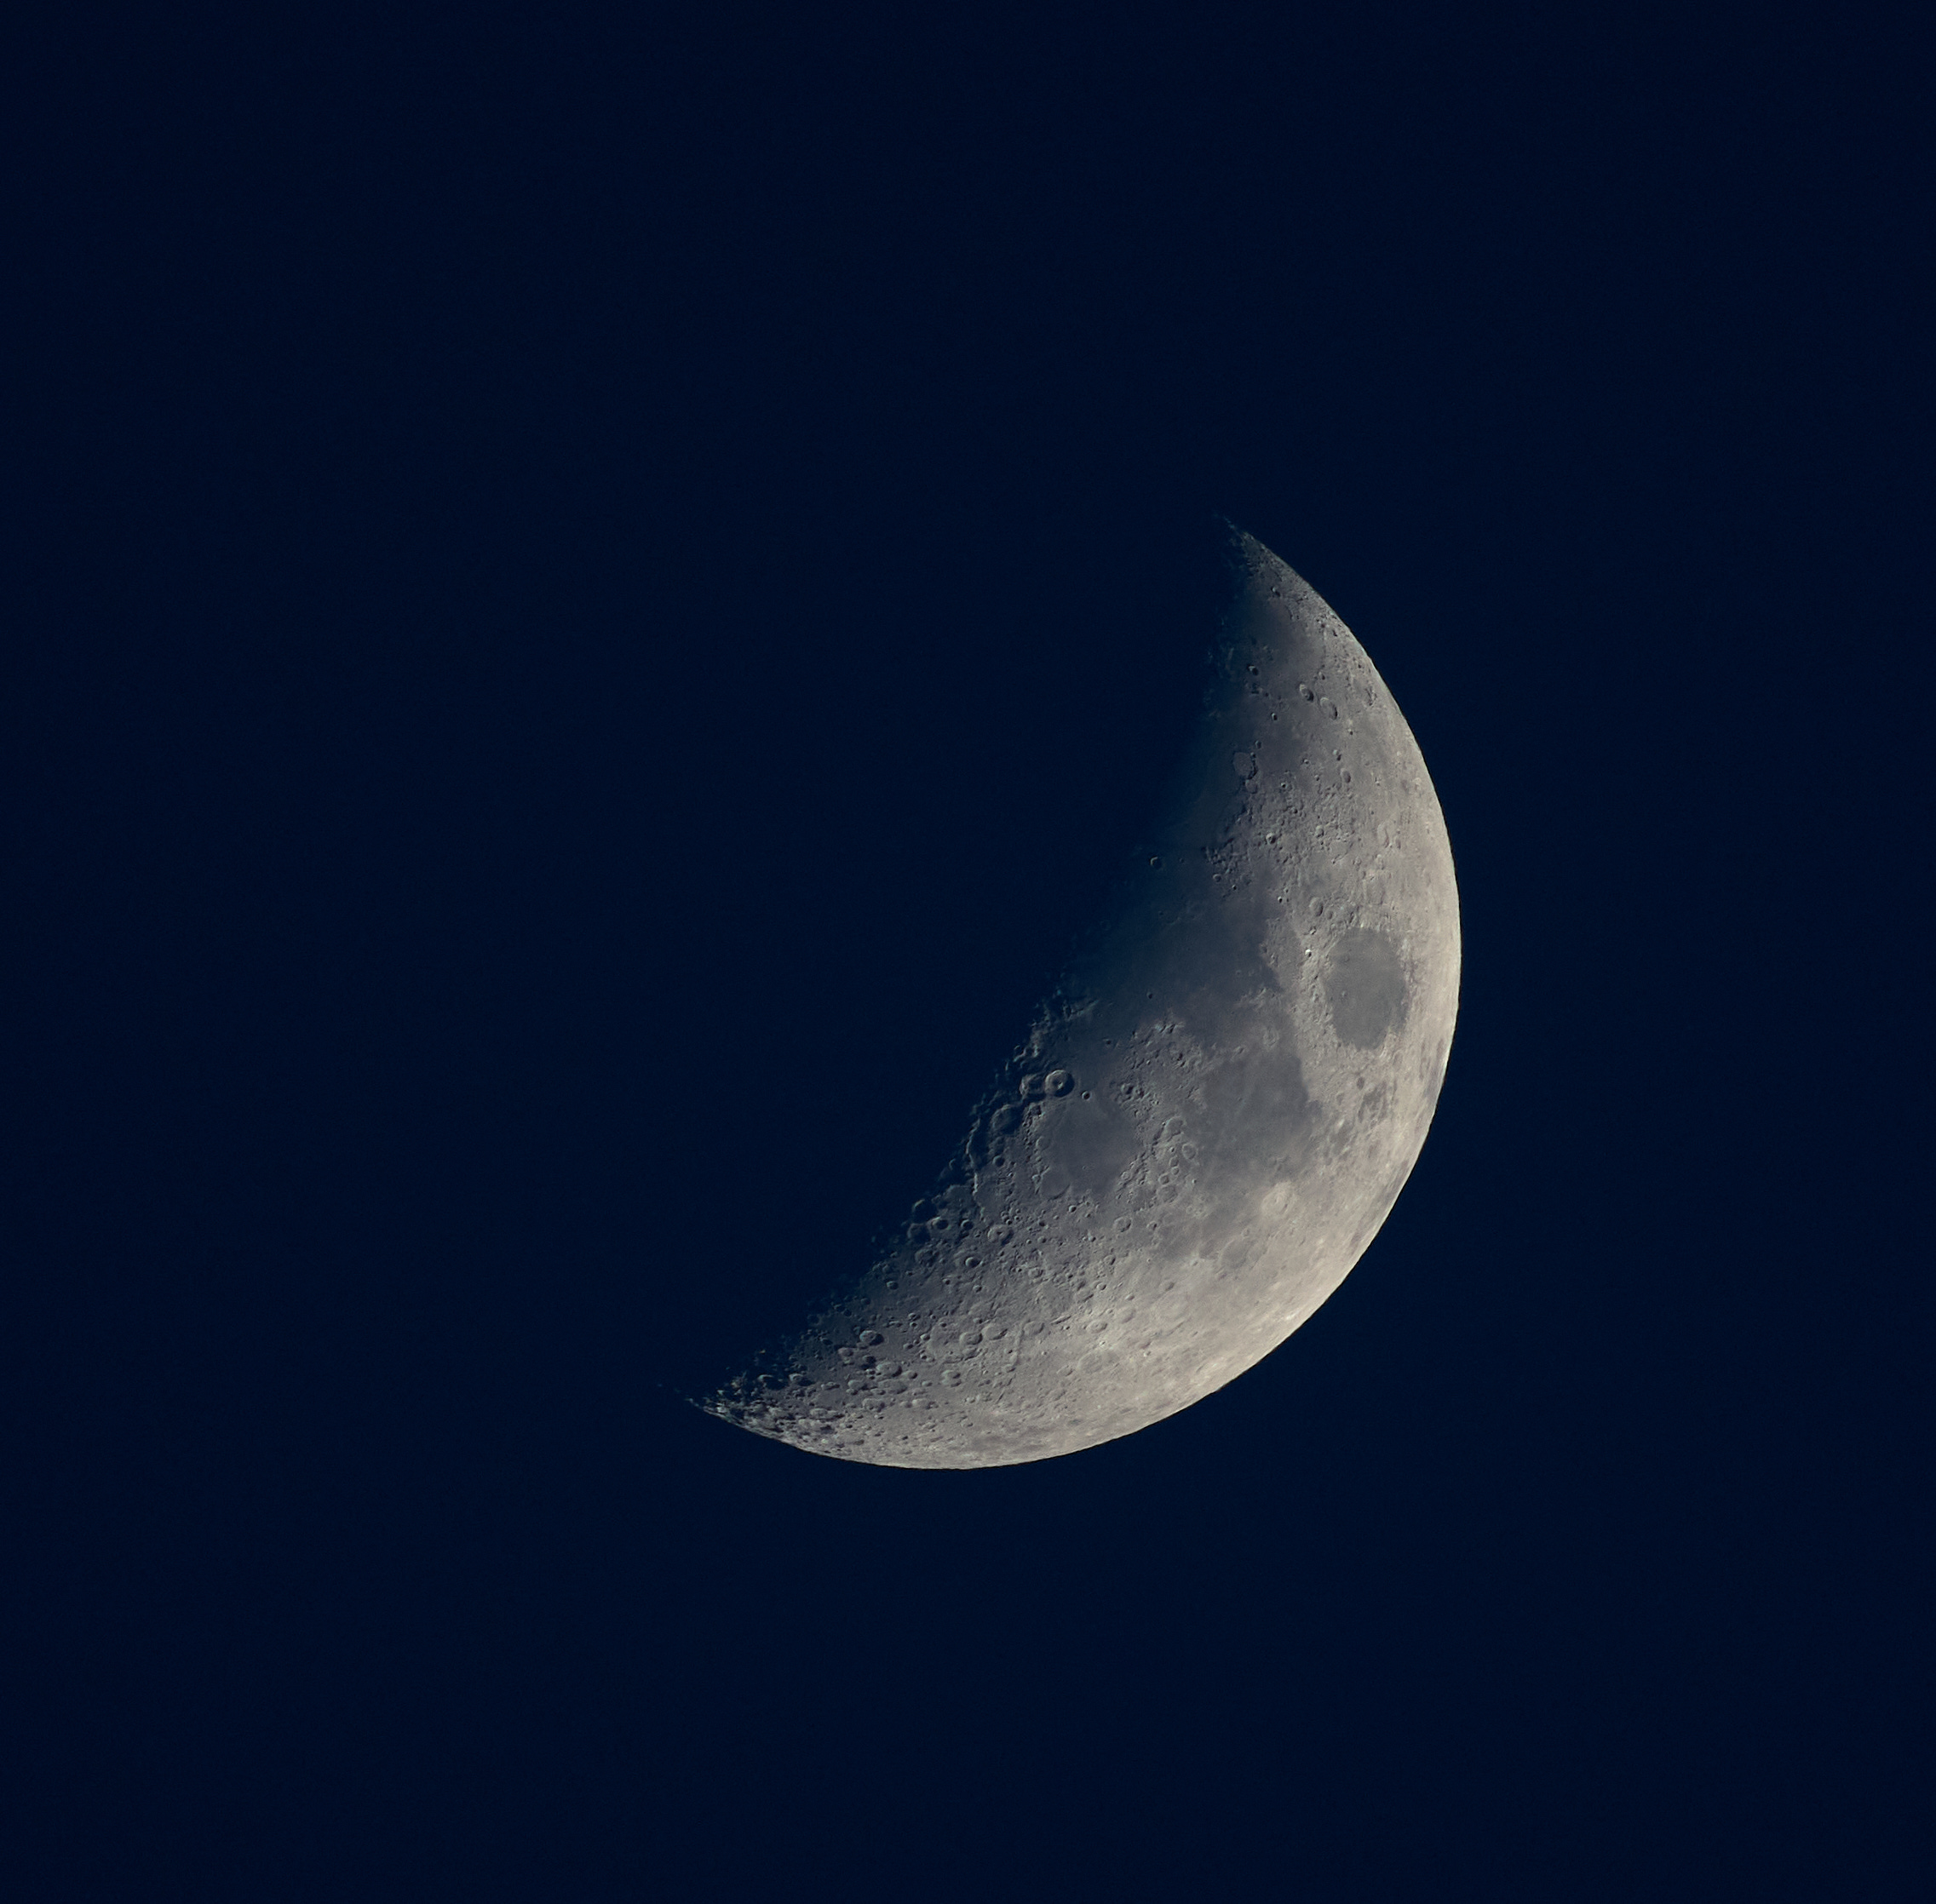
The image above is ‘best of both worlds’—the sky has been darkened, and the contrast of the moon’s surface details has been adjusted to be higher. You can make out very subtle differences in the color of the moon’s surface—that’s intentional, I adjusted the color to get a more or less neutral color cast on the moon’s surface. However, the blue cast is still strong enough to eliminate any bit of color change on the moon. (There are very very minor color differences, and without the daylight blues, those could be brought out a little bit by massively increasing color saturation.)
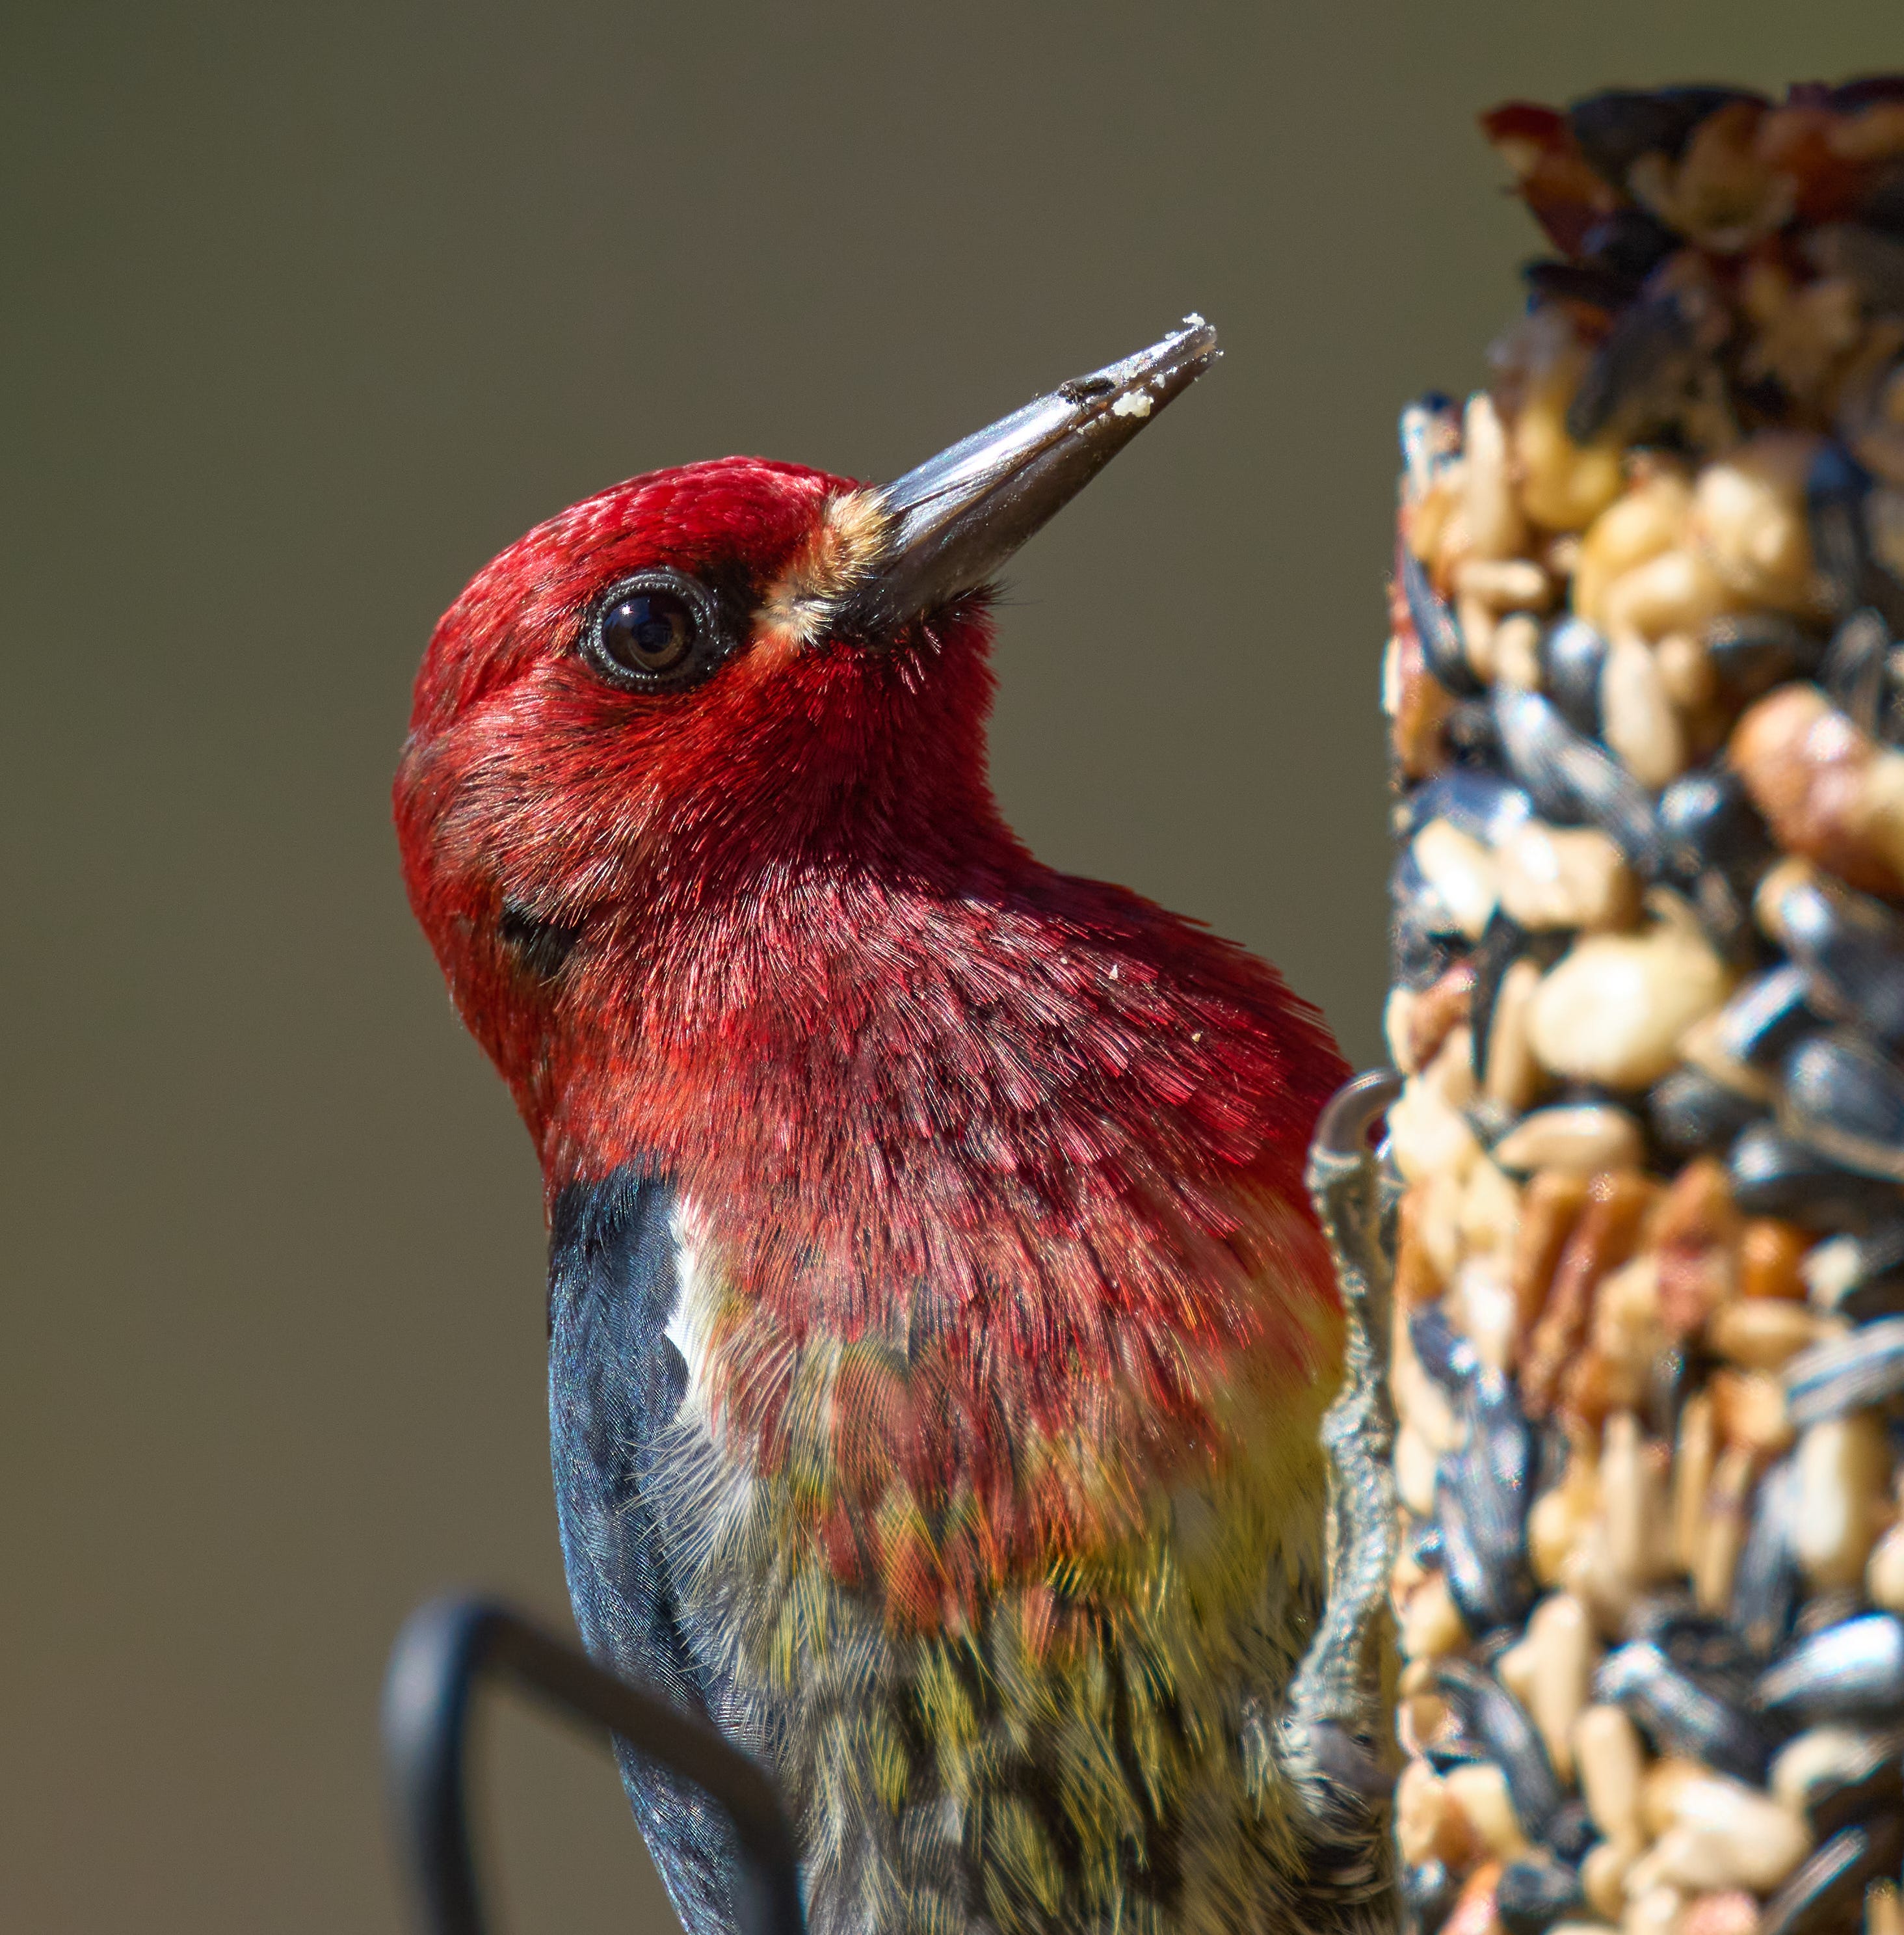
How did the lens do photographing birds? Quite well. I’ll have more bird photos over the next few days, but here’s one that turned out quite well.