How to Make a Panorama
The broad strokes of building and balancing a panorama. There are also a ton of small decisions to make on the way, but those involve mage processing and digital development.

I posted a previous photo from one of the images used in this panorama. The process of setting up a pano is longer than you would think, so the panorama doesn’t get posted until some time after a single image gets posted.
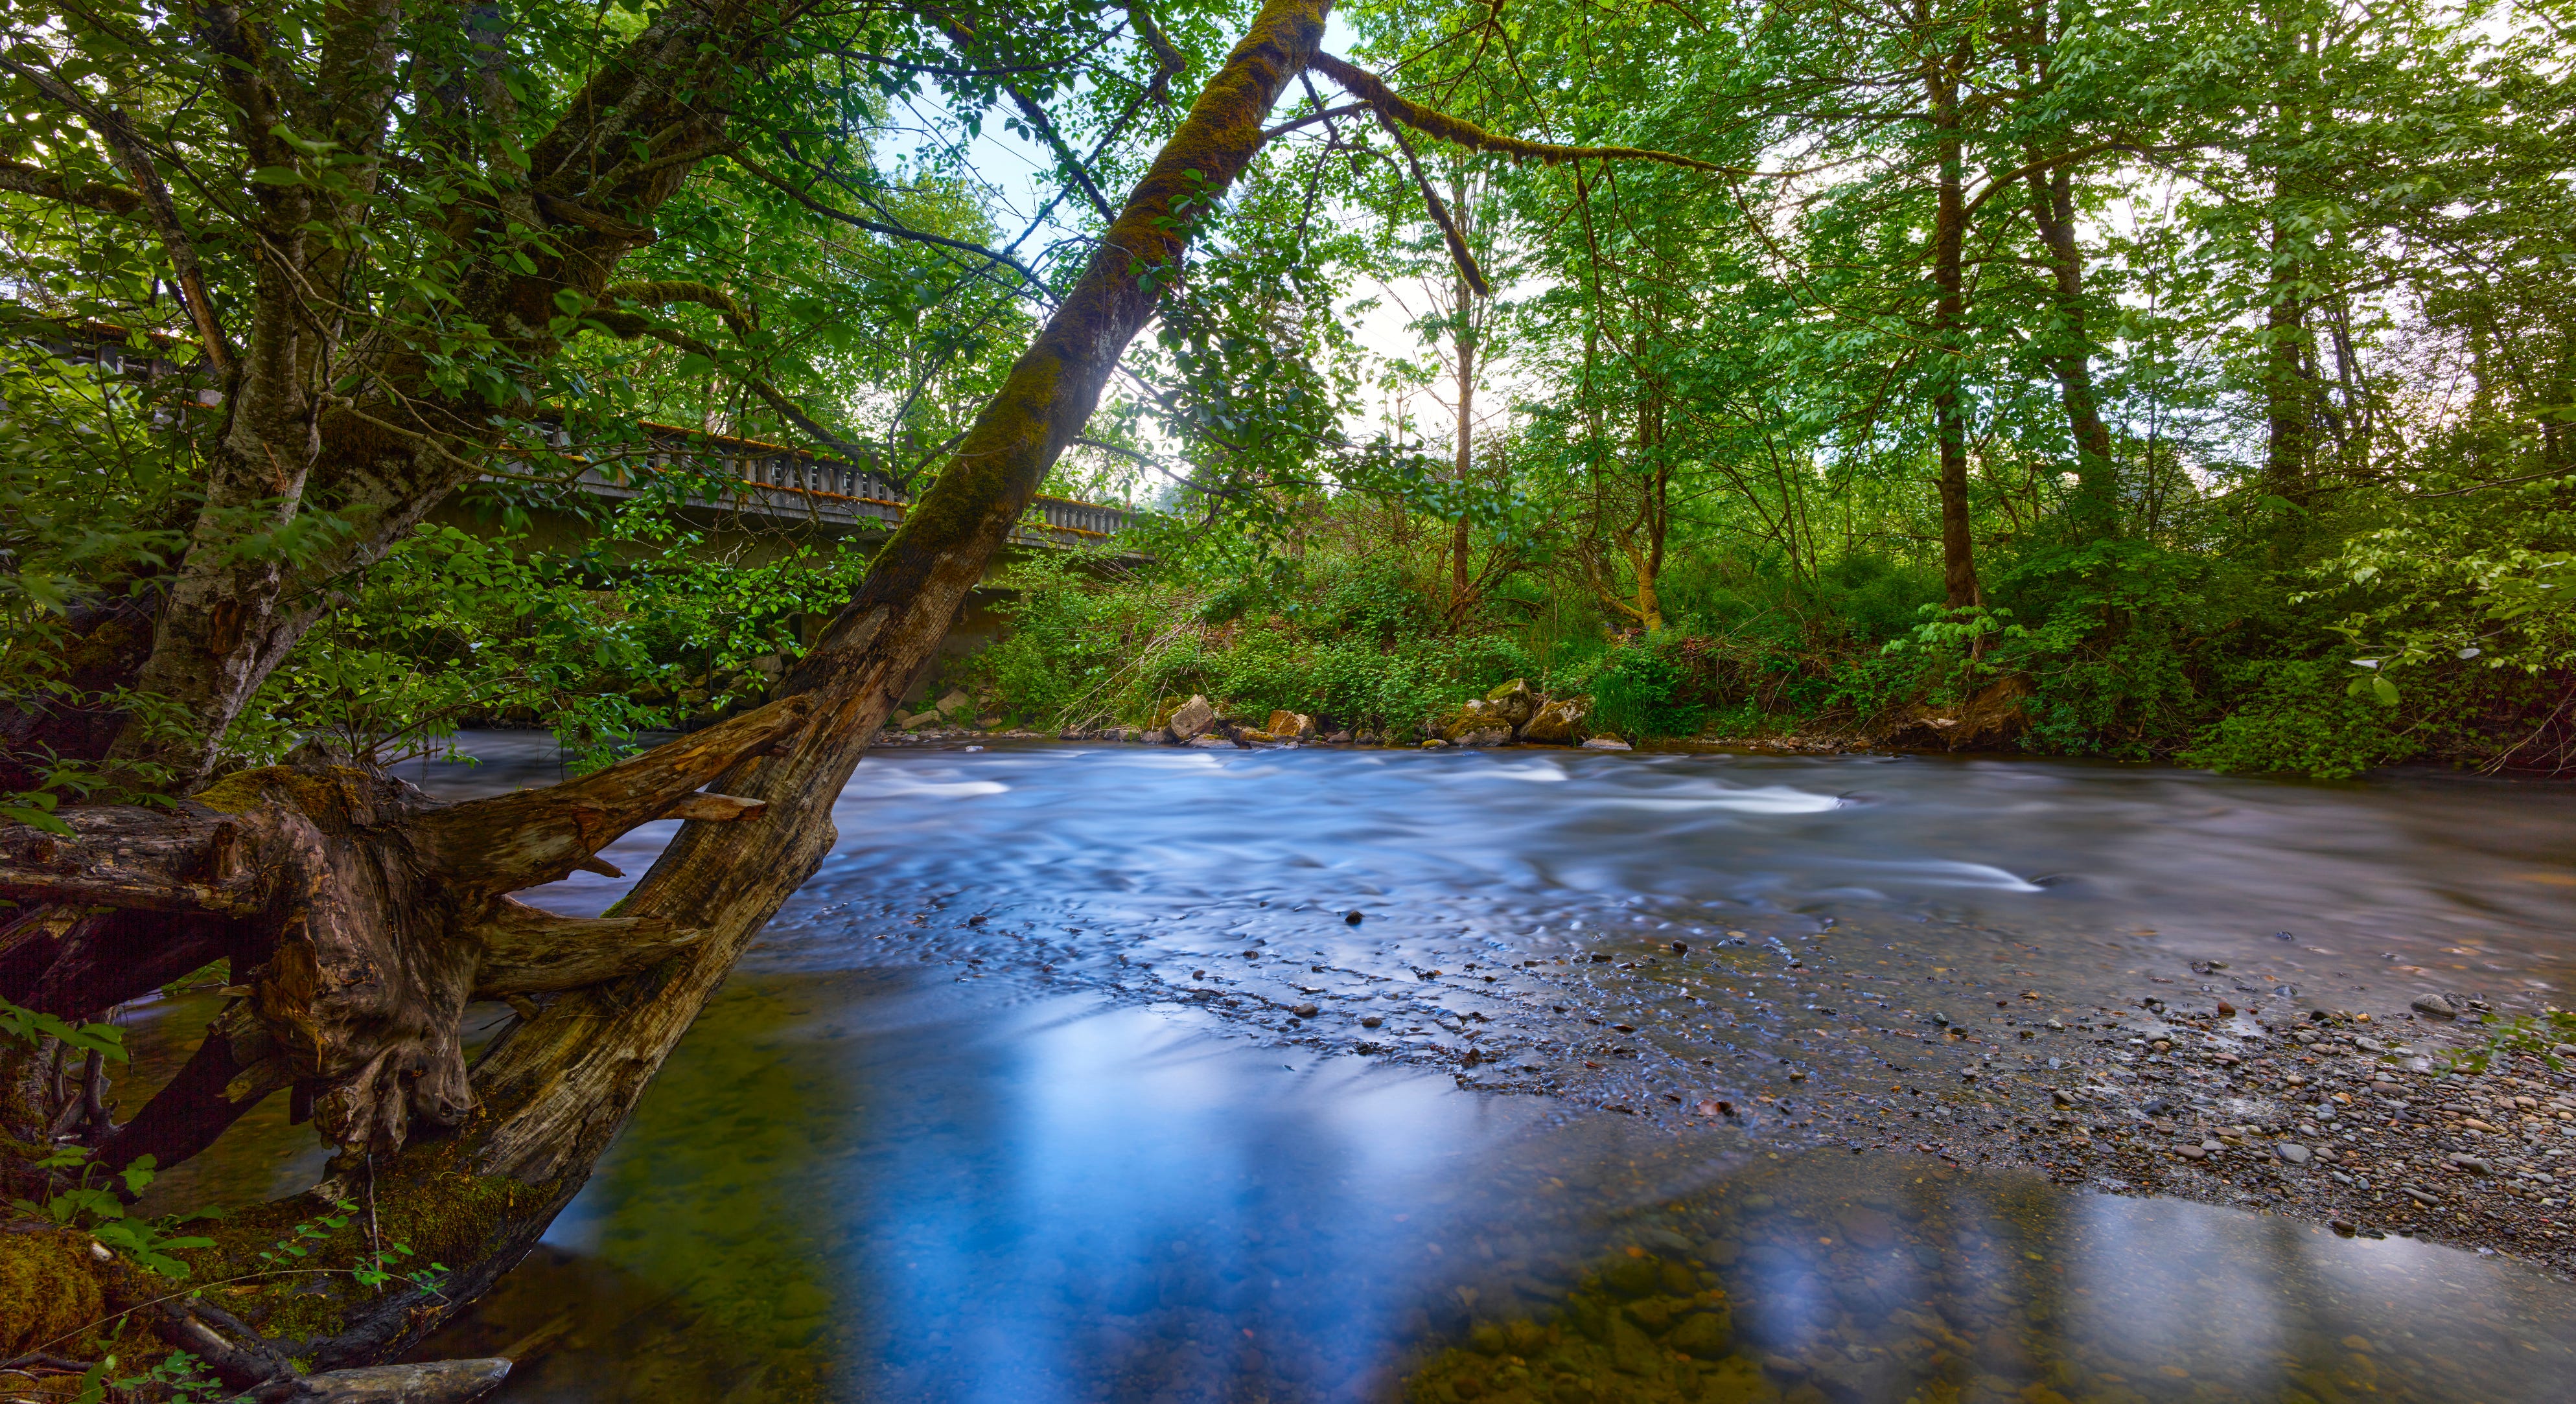
I’ll run through the steps below. This pano features more of the gnarled and piled up tree trunks on the left, and the full span of the rapids east of the bridge. As I often do, I have mixed warm and cool colors in my processing to energize the image.
Technical info: This is a 3-image pano, using the sliding back technique I talked about here. These images were taken with a neutral density filter to give me a much longer shutter time. This smooths out the water in interesting ways.
Each of these images was a 30-second exposure. I generally like to get 20-60 second exposures to smooth out the water; the exact duration depends on the nature of the movement of the water.
The rapids show the white water as a shape rather than individual splashes. The smooth-looking portion of the water shows sky reflections in some places (bright) and in other places you can look through the water to see the stones below. Both the reflection of the sky and the see-through effect are a result of the long exposure. The long exposure averages out the light, eliminating the tiny wavelets that break up the reflections and give the water texture. That texture is missing here, giving an unnatural but pleasing look to the water.
If you look closely, you can see evidence of tiny standing waves where the water had moved between the rocks at the edge of pool in the lower half.
Here’s the processing procedure for a panorama like this one:
Load the images into Capture One if not already there.
Pick a representative image, often the middle one, and apply digital development. This includes such things as adjustments to the exposure (density), relative brightness of zones (white, highlight, shadows, and dark areas), sharpening, saturation, and so on.
Copy these changes and apply them to all three images.
If there are any calibration images, apply those to each of the images. There is always a lens cast adjustment to sliding back pano images, because they move the sensor into the parts of the image circle that have variable brightness.
Export the images for making the panorama. I use 16-bit TIFF images to preserve the subtle details in the raw data.
Import the images into Photoshop or Affinity Photo to make the pano. Affinity often does better on the subtle aspects of a panorama, but Photoshop seems to handle more serious issues better. So the quality of the image data determines which I’ll try first.
Tweak the panorama as needed. This might mean cropping, or there may be more severe issues to deal with the less high quality lenses.
Decide: either complete processing of the pano in PS or Affinity, or export for more serious work in Capture One. Generally, if am not happy with the color balance or other critical issues in the image, I will complete processing in Capture One.
Output the image as a JPG of, usually, 5-10MB
It takes about an hour to process and build a 3-image pano; problems or more images may take up to several hours. And sometimes after the pano is done, I radically change my mind about the result and do it over with new ideas. I enjoy processing quite a bit, so the time it takes doesn’t matter much, it’s fun because I’ve been doing some form of image editing for decades now. A real busman’s holiday. :)
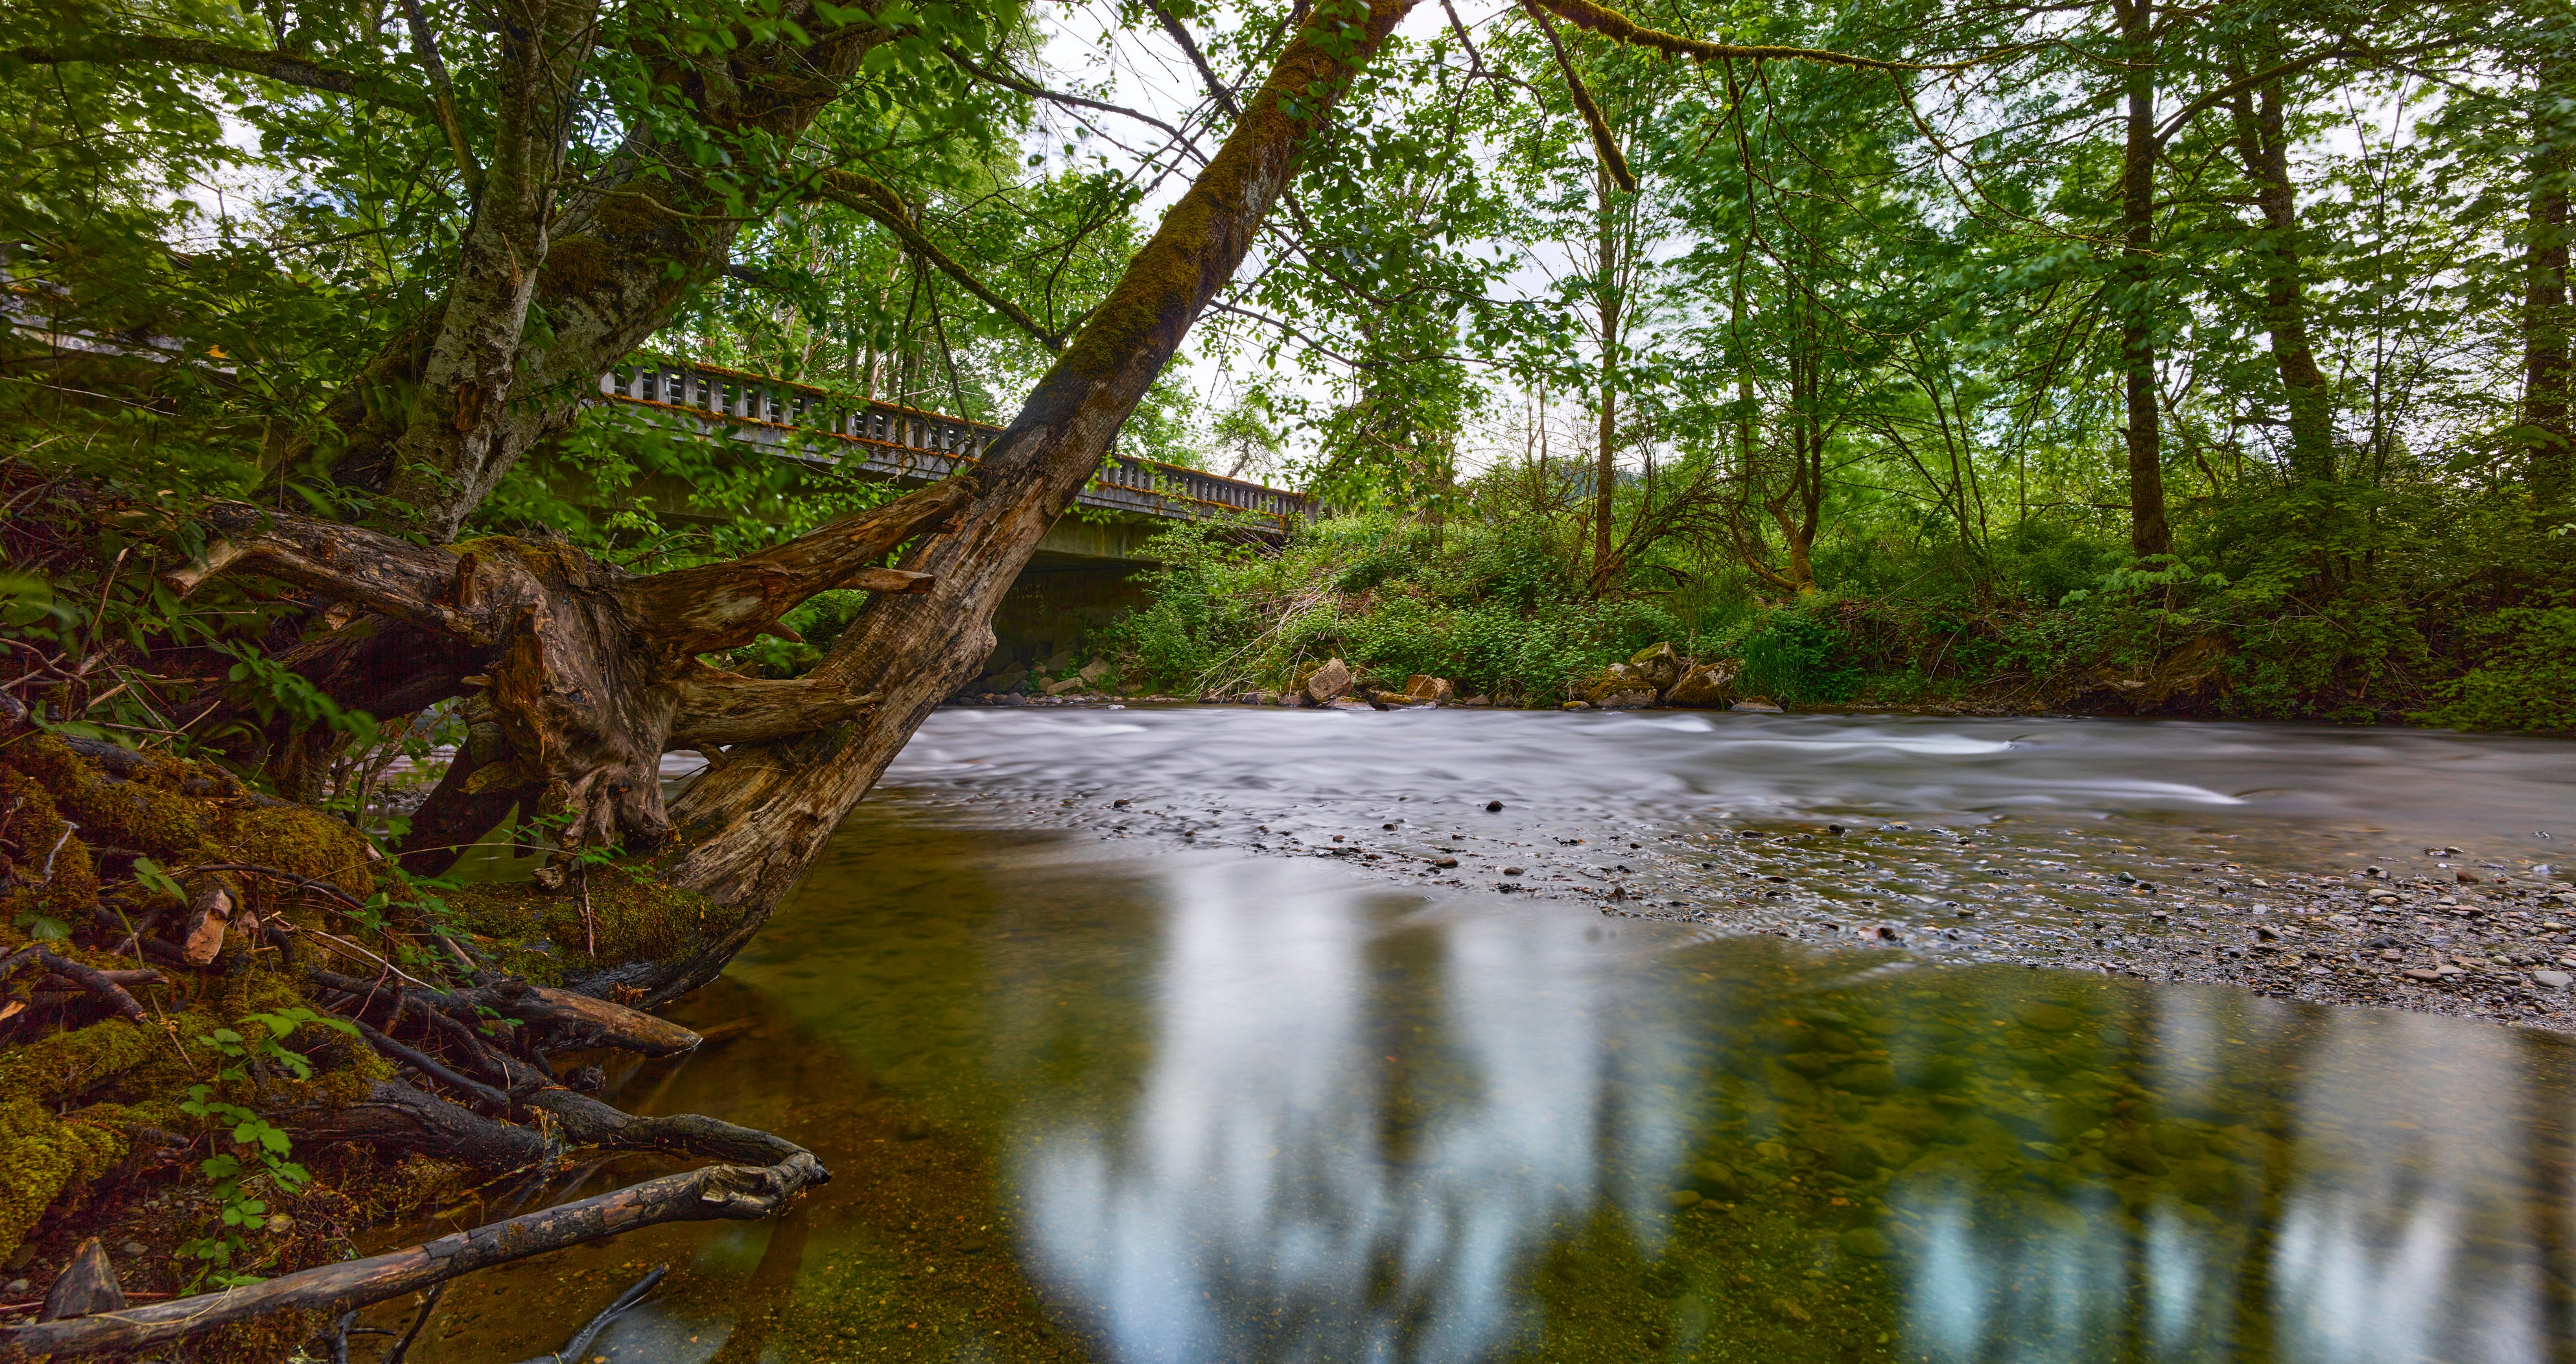
I visited this same spot on a sunny day, and got this much brighter, deeply blue-sky reflecting panorama out of the images: